We’re going to start the basic repository, add all our teammates & set up a better GitHub code review process to enforce code reviews for each other.
-
Video or tutorial
You can watch the video(s) or follow along with the written tutorial—or both—they convey exactly the same information.
Goal
Create an organization
PMFor this project you’ll all be owners of the code-base and the application. To better support this we’re going to create an organization, that way the repository won’t live directly in a single user’s GitHub account.
The project manager should go to GitHub and create a new organization.

In the + menu go to “New organization”.
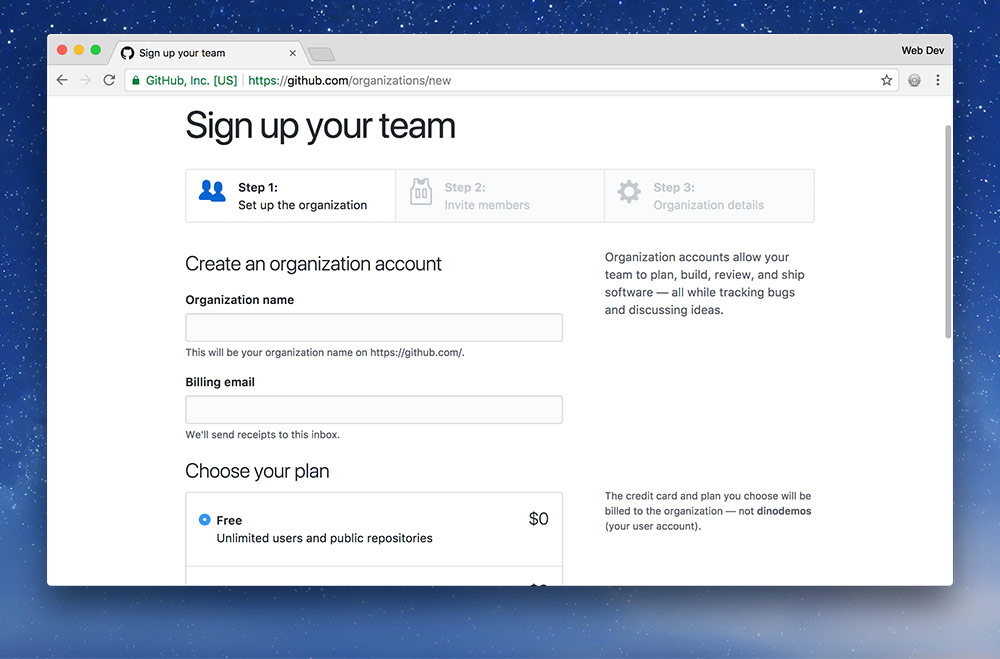
Fill in following pieces of information about your organization:
- The organization URL, will end up like this:
https://github.com/your-org-name - The email address of your project manager.
- Select the “Free” organization type.
- Then press the green “Create organization” button.
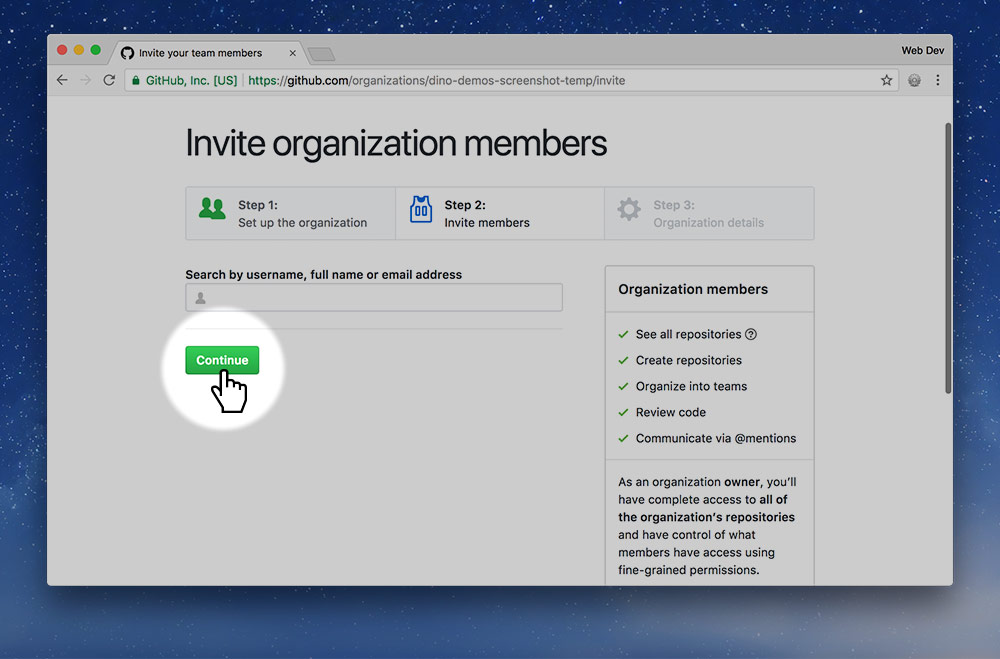
Skip the “Invite organization members” step and continue to the survey.
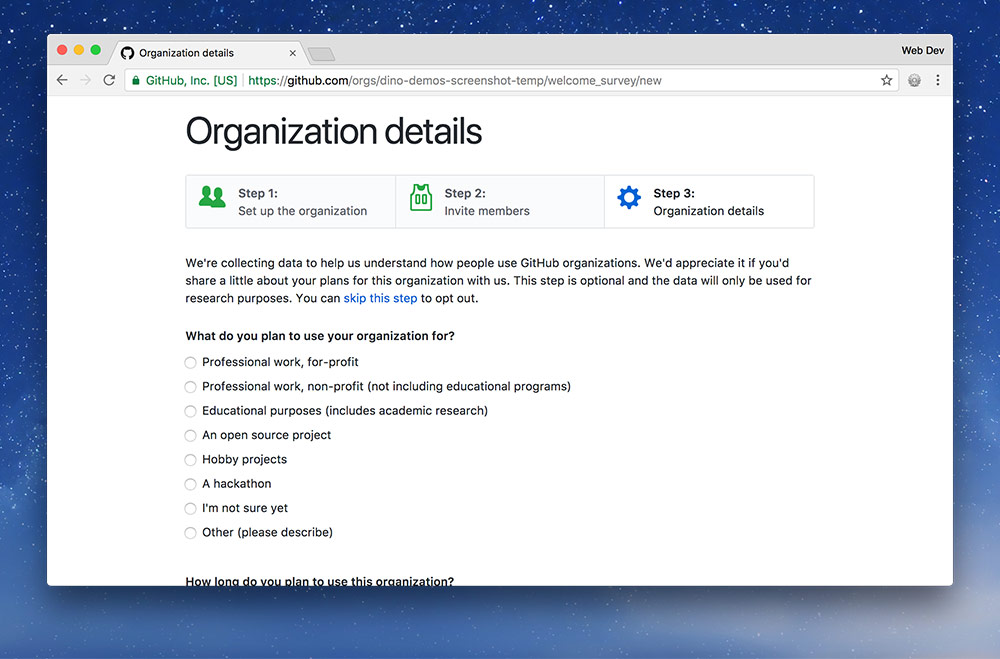
On the survey, use the following answers to the three questions:
- “Educational purposes (includes academic research)”
- “A few weeks to months”
- “5 or fewer”
Then press “Submit”.
Customize the organization
If you’d like you can also customize some properties of the organization by going to the “Settings” tab.
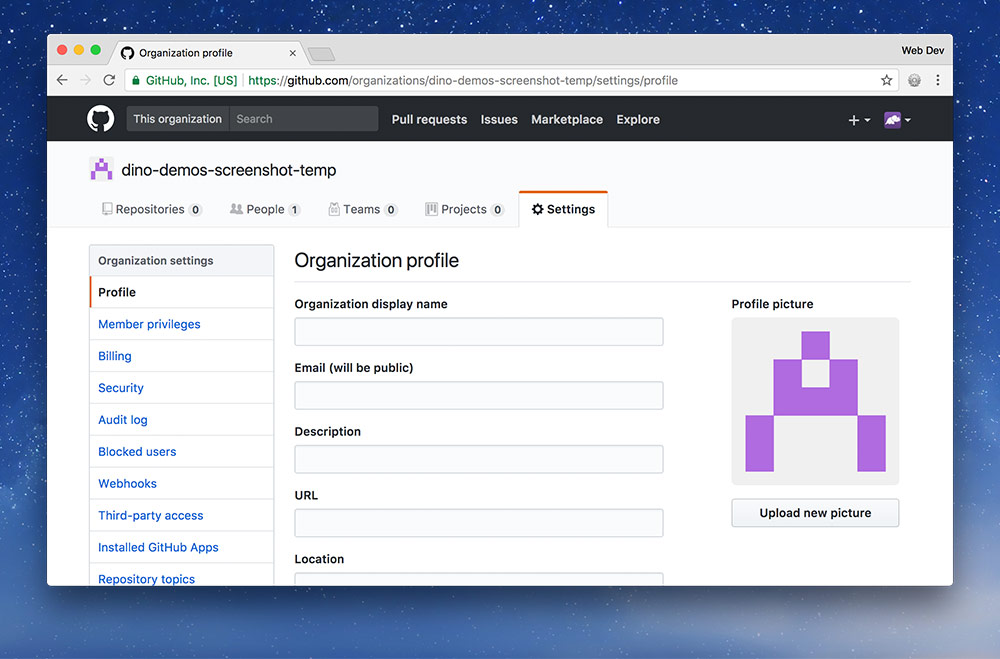
Upload a profile picture of your organization and enter a better “Organization display name”. Fill out any other details you’d like.
Add all the team members
PMNext up we’re going to create a team to give everybody equal permissions to the organization and its repositories.
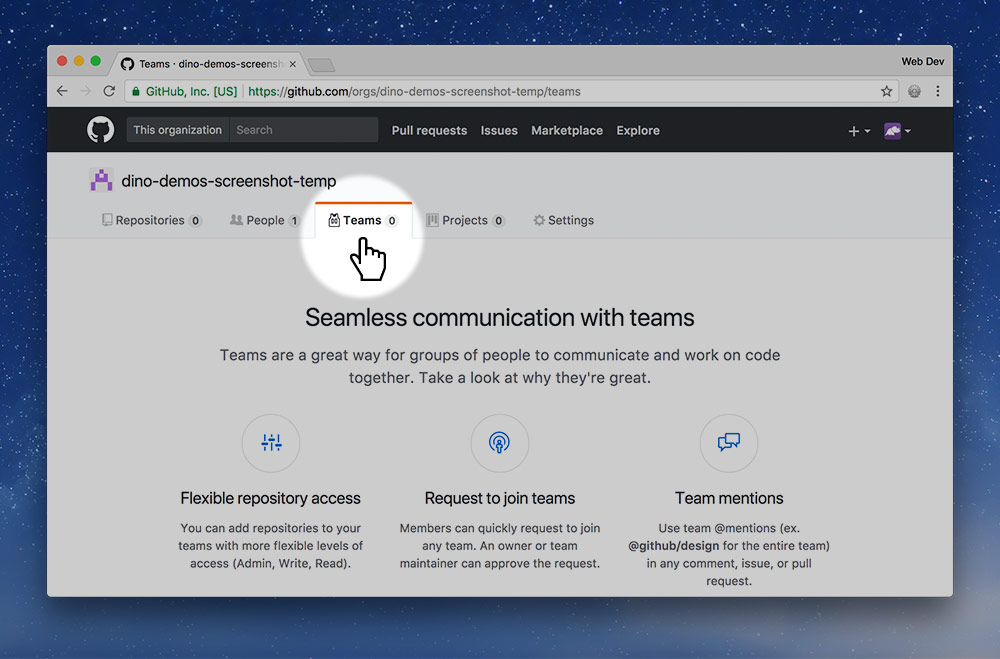
Click the “Teams” tab and press “New Team”.
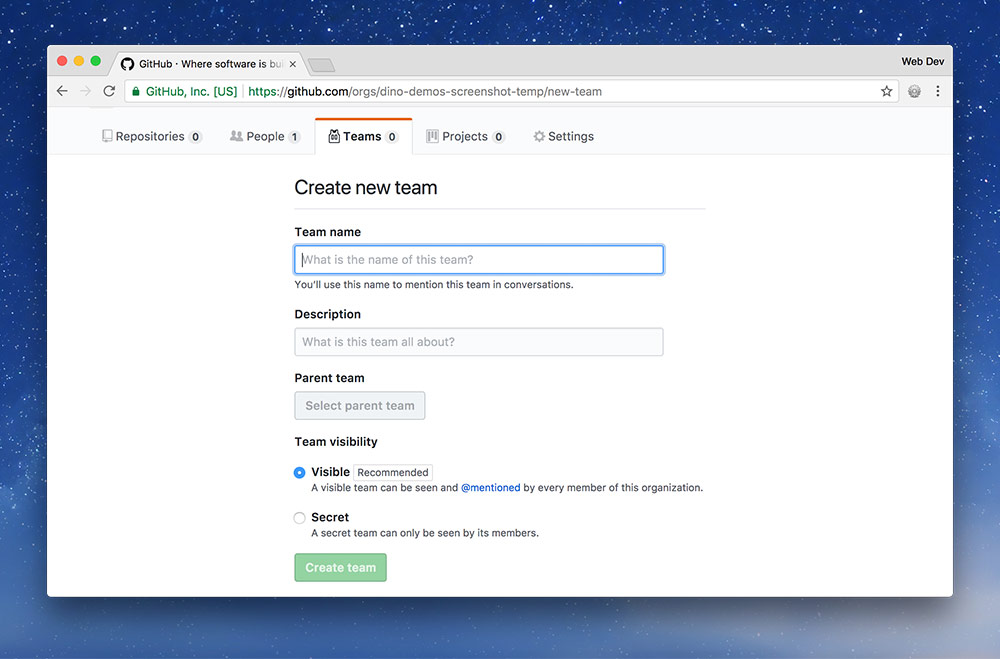
Fill in all the details about your team: the name you came up with, a description of your awesomeness, then press “Create team”
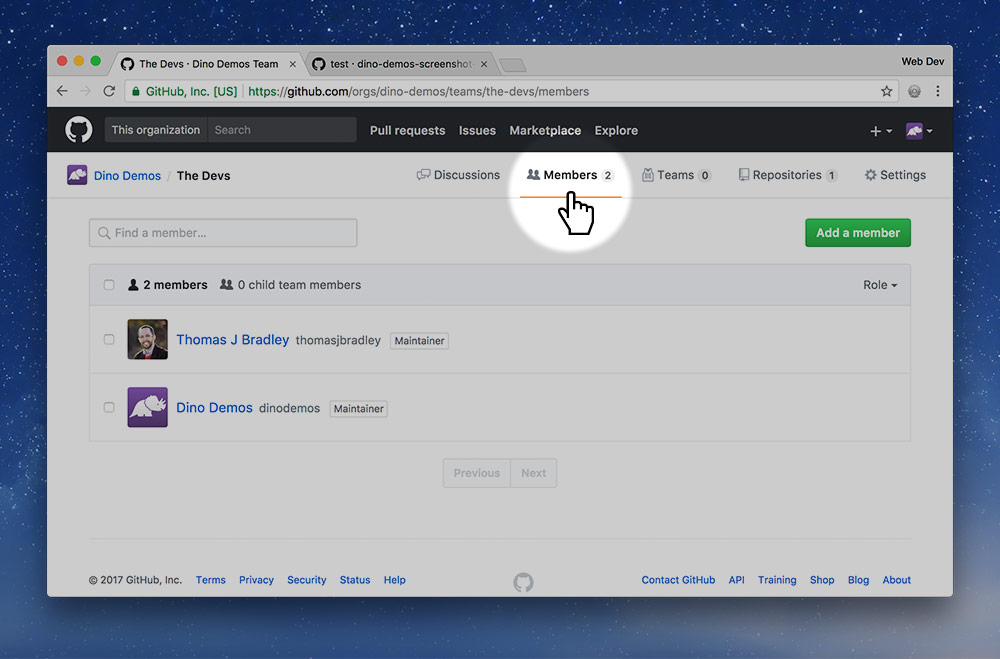
Next up we need to add members to the team because the project manager is the only member right now. So go to the “Members” link.
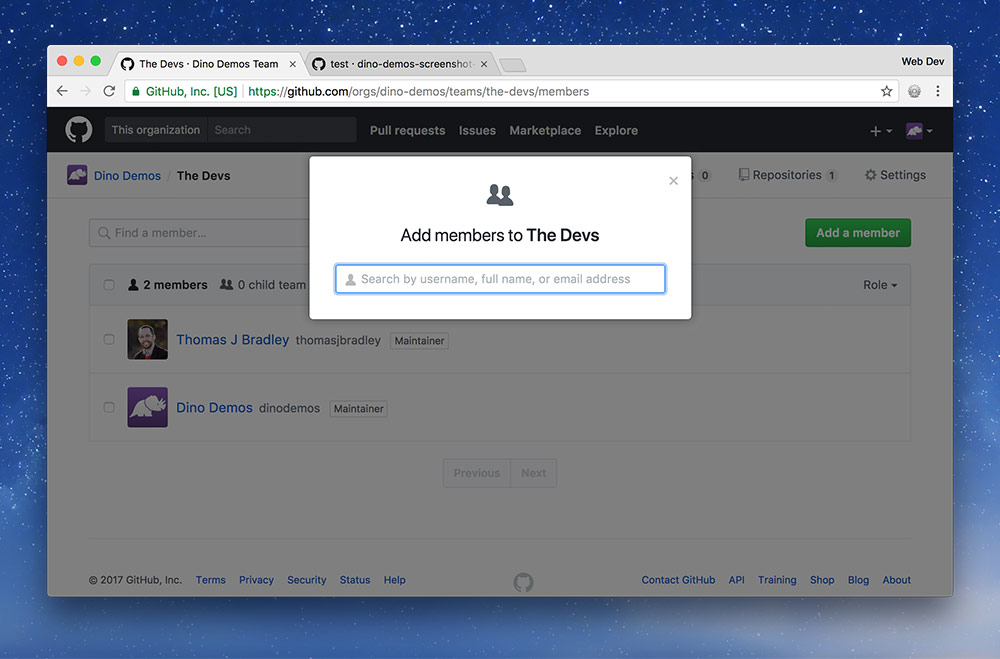
For each person in your group press “Add member” and type in their GitHub username. It will autocomplete.
Approve being a team member
AllNow every person in the group will get an email from GitHub. You’ll each have to approve being added to the team before continuing to the next step.
Make everyone a maintainer
PMRight now the project manager is the most important member of the team but we want everybody to have equal importance. So, we’re going to change everybody’s role to be “Maintainer”.
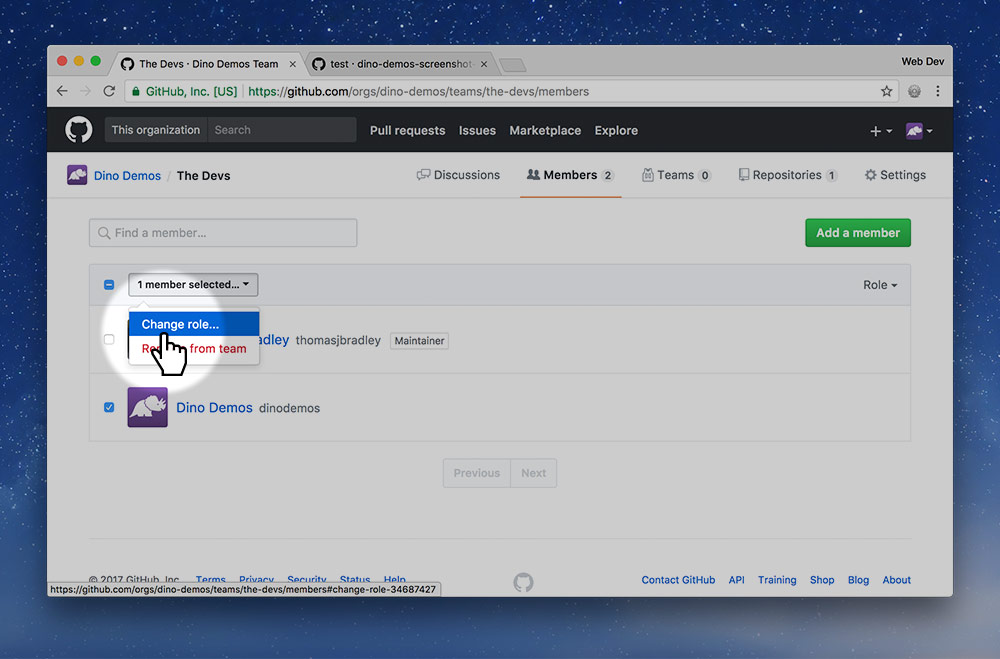
Select all the team members except the PM and click the “№ members selected” button. Then press “Change role”.
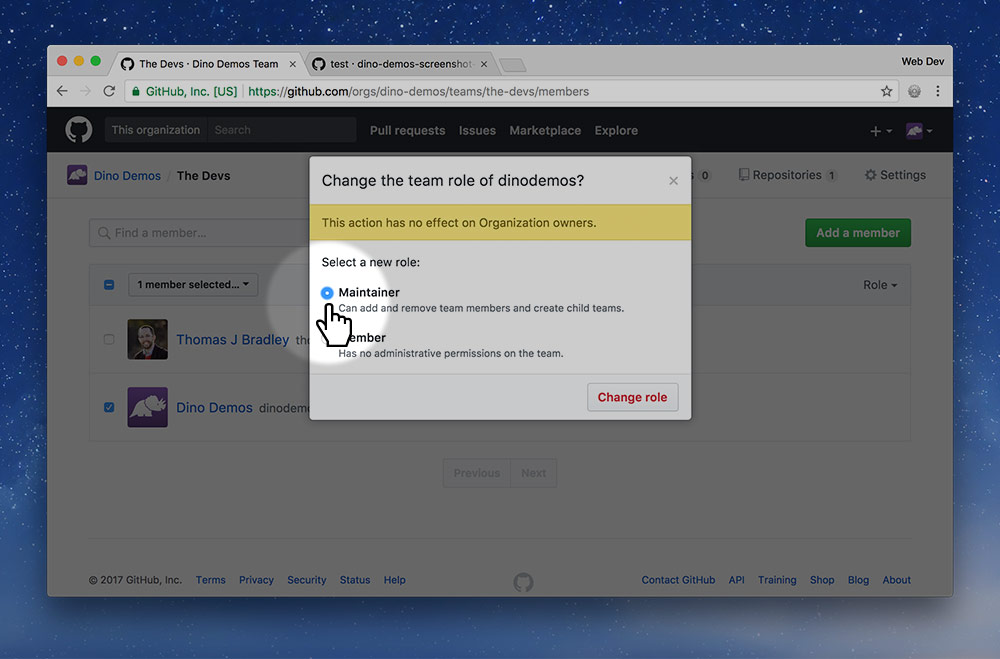
Change everybody to the “Maintainer” role and save the changes.
Now everybody can contribute to the project on the same level including configuring settings and managing teams.
Create the repo in the org
PMThe whole point of this is to make a shared repository to write code in—that’s what we’re going to do next.
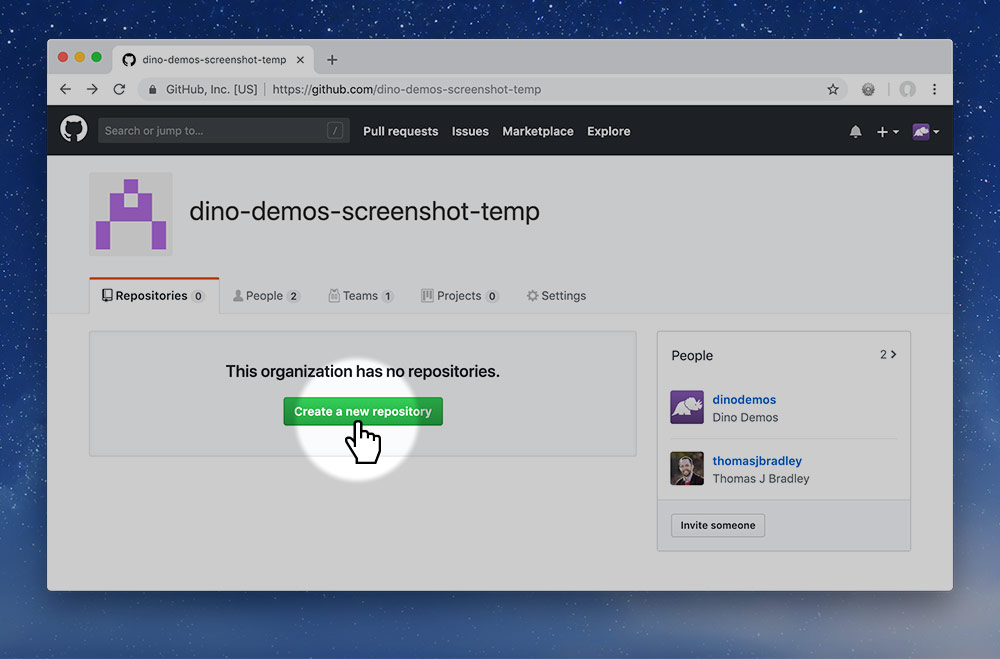
So, go back to the organization’s start page, to the “Repositories” tab and press the green “New” button.
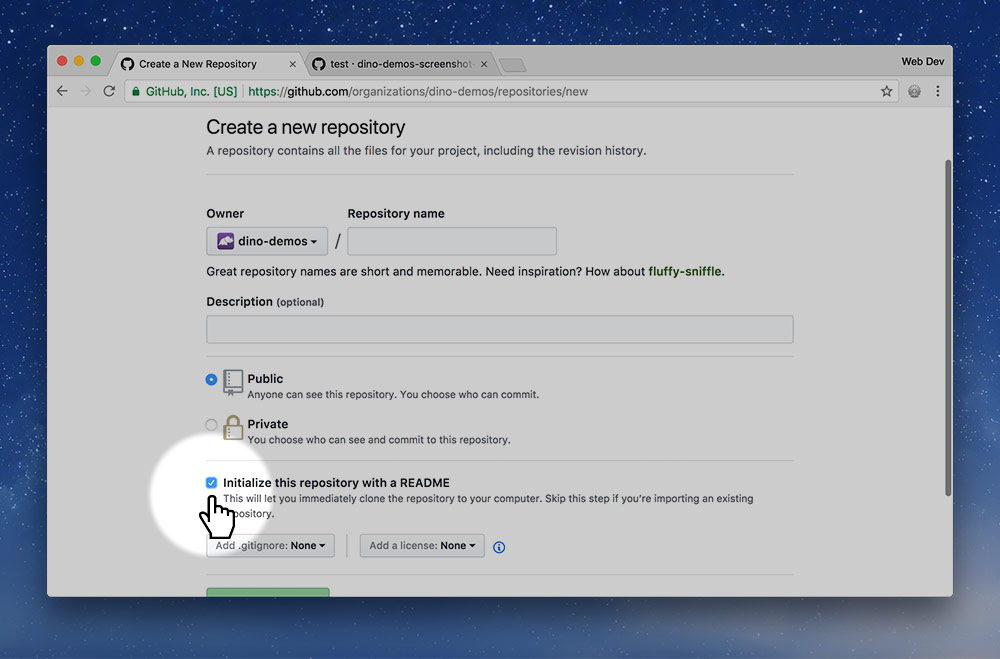
Fill in the standard details for your repository, you could name the repo something generic, like web-app, because you haven’t decided what you’re actually making yet.
Make sure to enable “Initialize this repository with a README!”
Protect the master branch
PMAs part of good software development practices we want to isolate the development code from the good, live code. Our master branch should always be in a good state so that it can be live on the website.
We do all our work on other branches and merge those into master only when the code is good enough. This process is a little different from what we’ve been following before.
So we’re going to protect the master branch so we can’t accidentally commit or push into that branch. We’re going to enforce a system of code reviews and approvals to help protect the master branch from getting ugly.
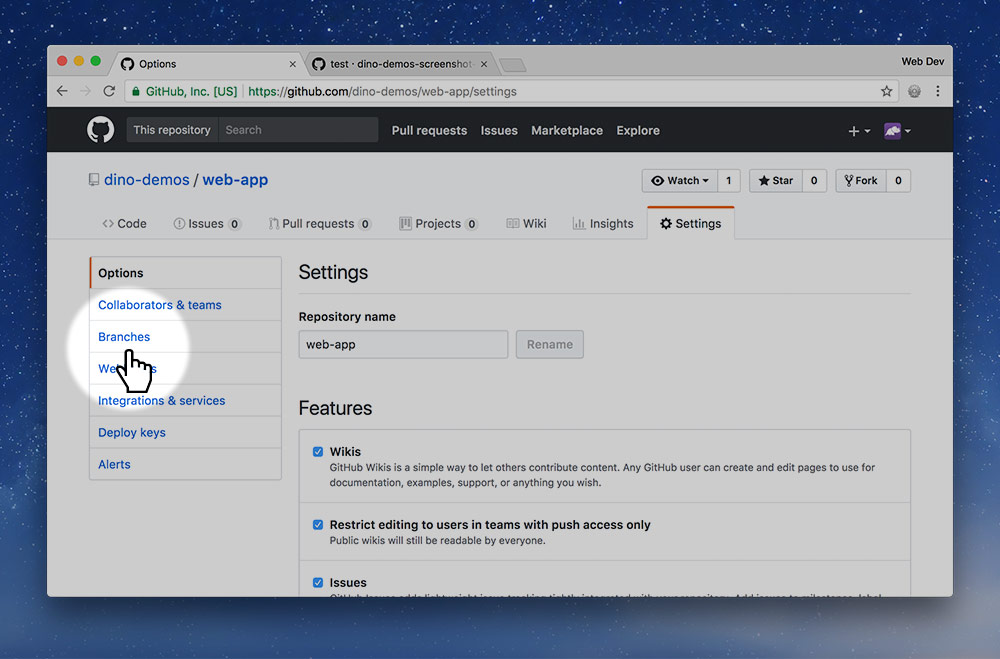
In the repo’s “Setting”s tab click the “Branches” button in the sub-navigation.
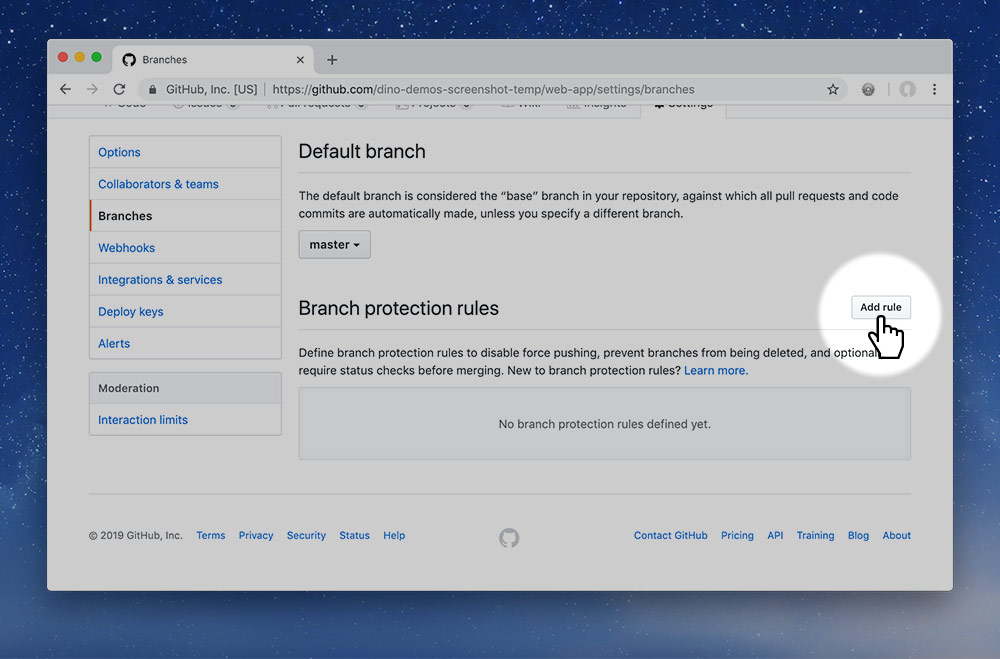
A little bit down the page is a “Branch protection rules” repository. Press the “Add rule” button.
Finally we need to configure how the master branch will be protected from our messing about.
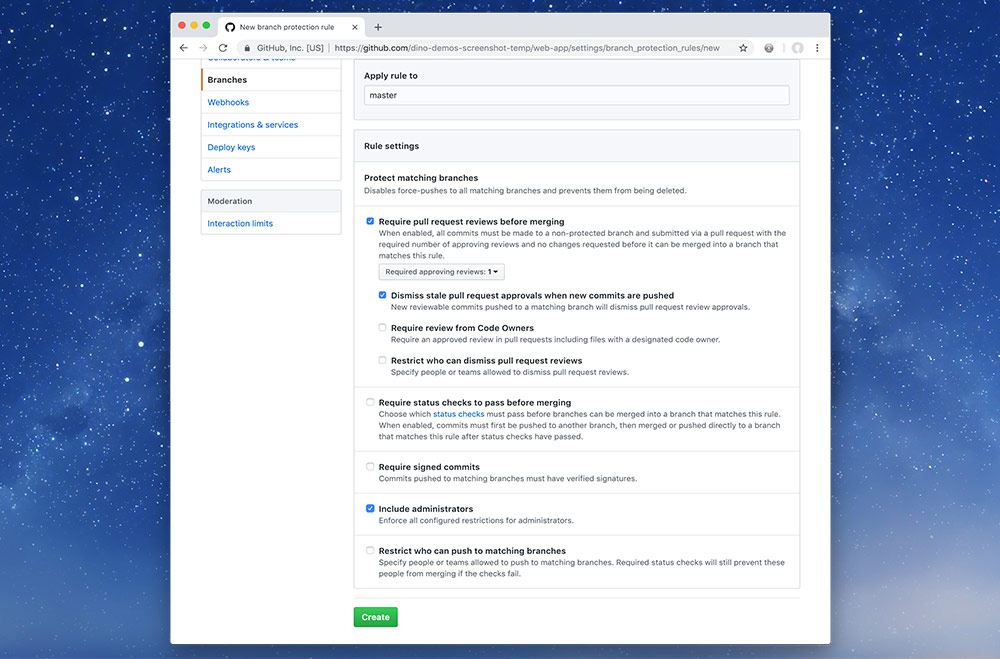
Select the following options on the screen and save:
- Type
masterinto the “Apply rule to” input field
This will prevent you from committing and pushing to themasterbranch—you’ll have to create a different branch. - “Require pull request reviews before merging”
This will require everybody to get someone else to approve their code changes before they can be implemented into themasterbranch. - “Dismiss stale pull request approvals when new commits are pushed”
If someone has approved the code changes, but then the original author creates a new commit, the approval will be voided. - “Include administrators”
Enforces these rules on everybody, even if they are an admin of the project (which you all are).
Make sure to save the changes.
Make the team members admins
PMNext up we’re going to give everybody administrator access to this repository. This will allow everybody access to configure and adjust the repository. Our goal is to make everybody equal partners in the project.
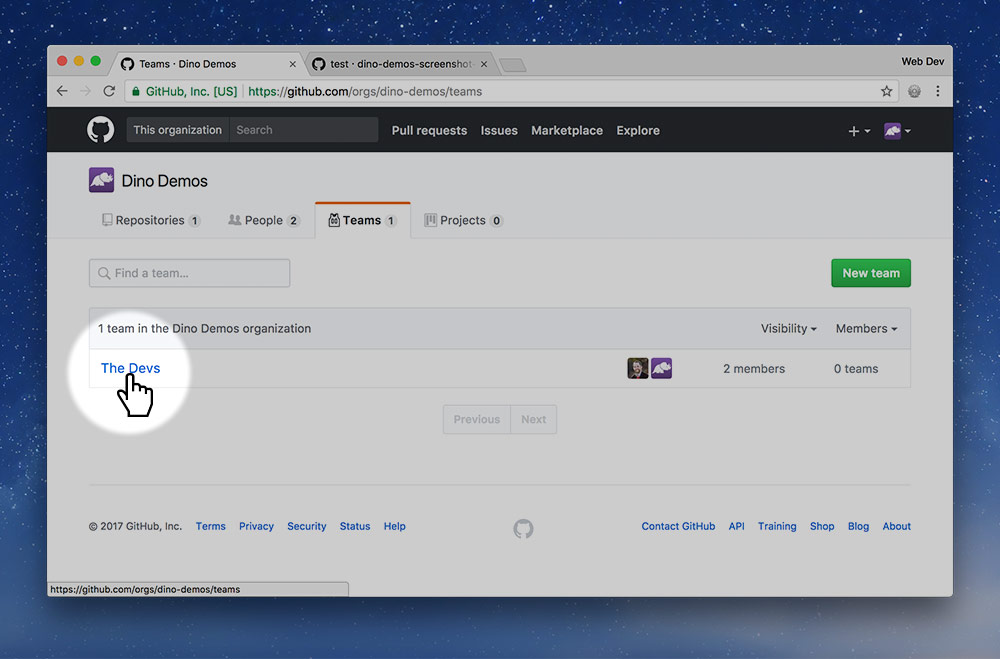
Go back to the organization page and select the “Teams” tab, then click on your team’s name.
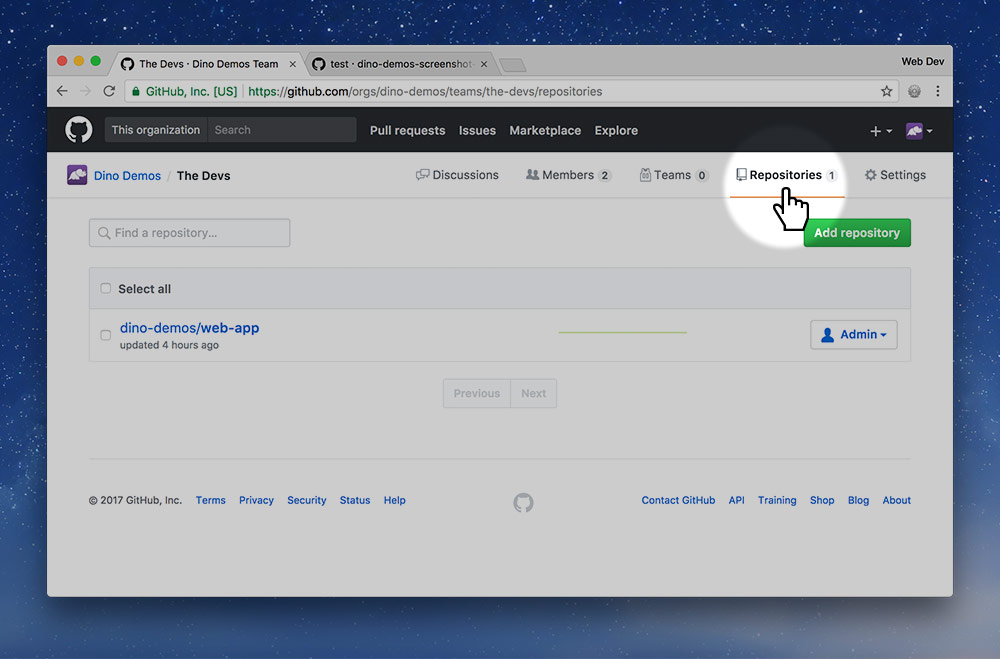
Go to the “Repositories” tab for your team.
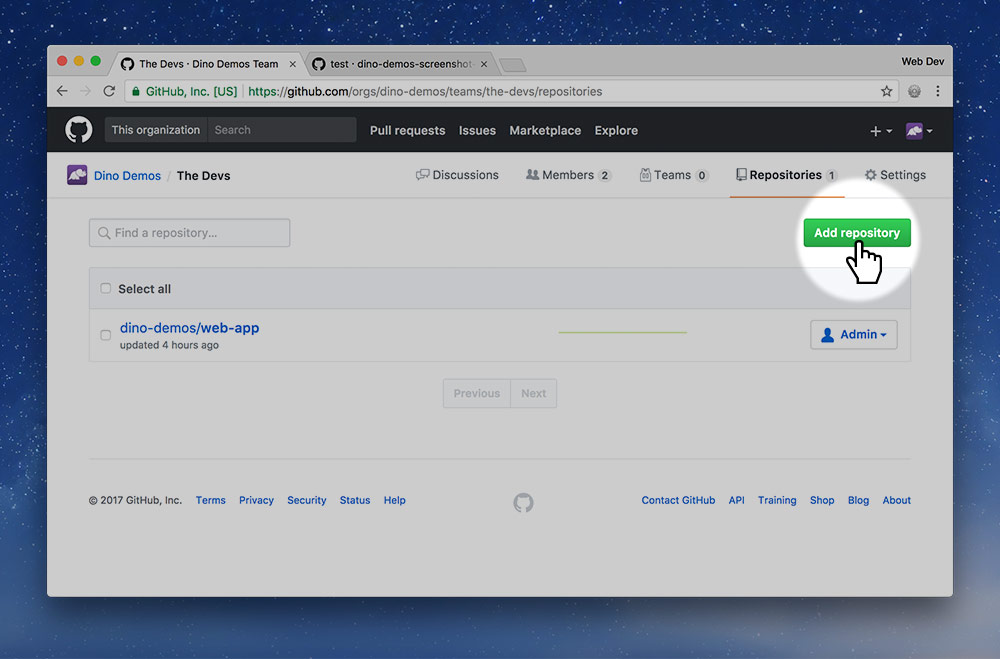
Press the big green “Add repository” button.
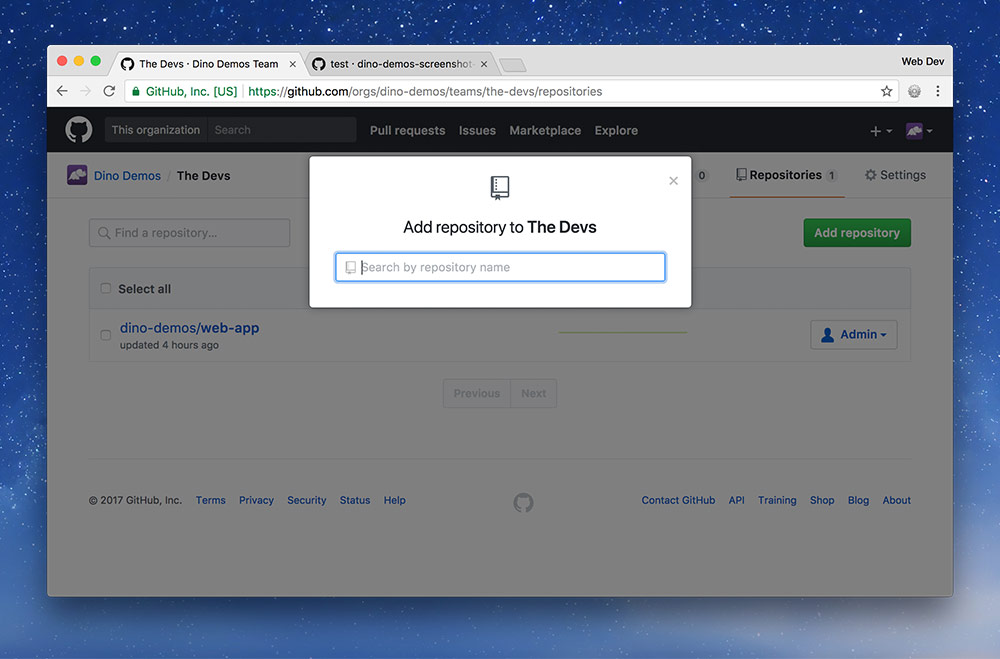
Search for the name of your repository and add it to the list.
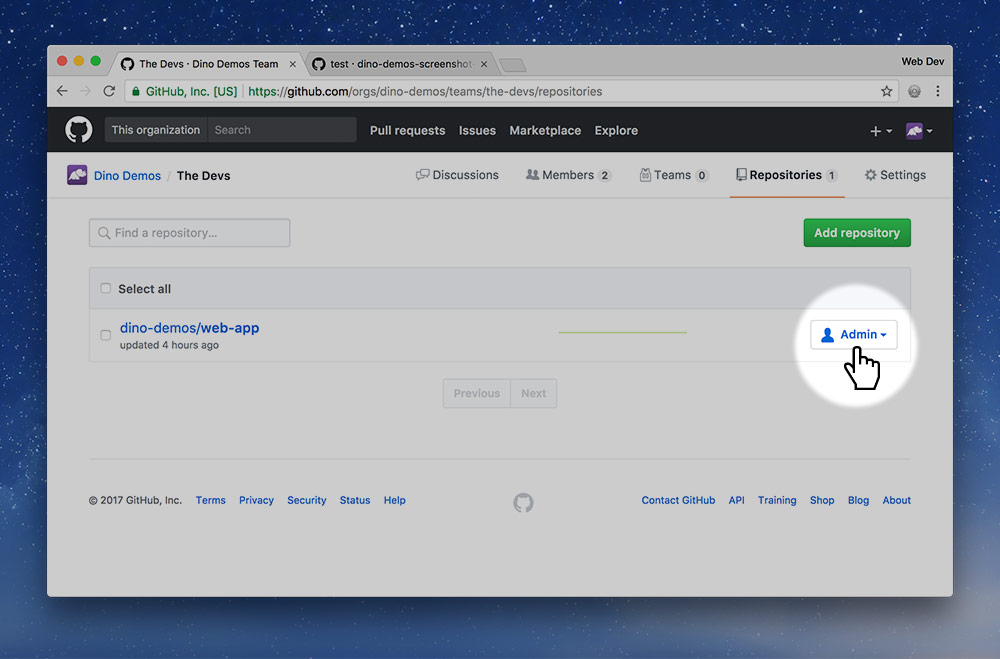
Double check that your team is set as “Admin” for the repository—which I think is the default.
Now our organization and team is ready to go!
Clone to everybody’s computer
AllFinally, something for all the team members to do, though it’s really small at this point: clone the repo to your computer.
Everybody should go to the web-app repository and clone it to their computer using the standard procedure.
Create a temporary branch
DevThis step is for the dev lead to complete. We’re going to create the readme with some basic information for now that can be filled in with more detail later.
After cloning the repository we’re going to make a new branch in the GitHub Desktop app.
Remember that we cannot commit and push to the master branch.
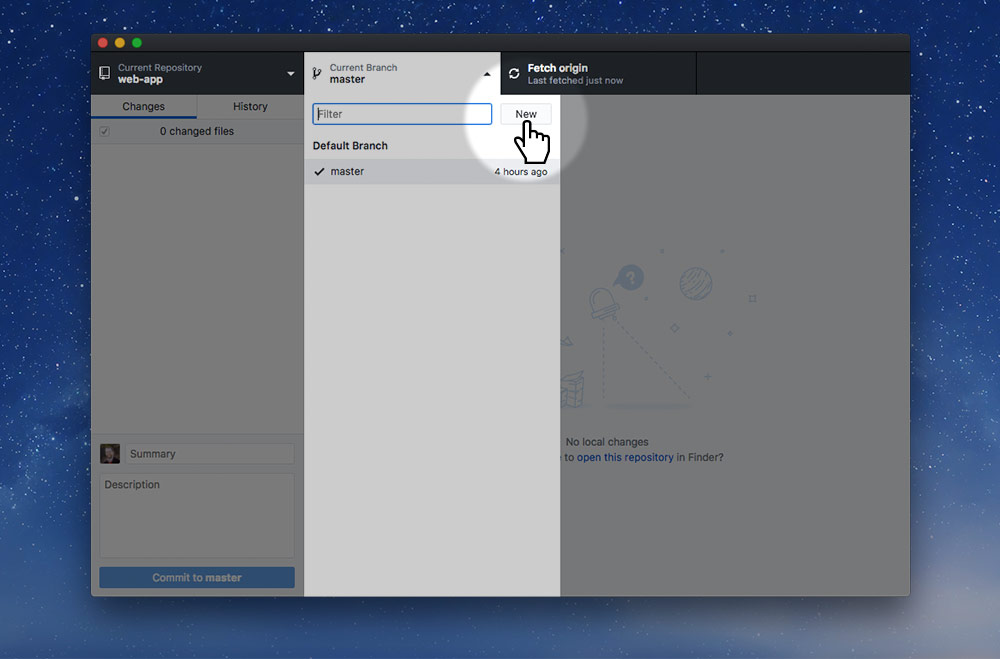
Click the branches button and press the “New” button.
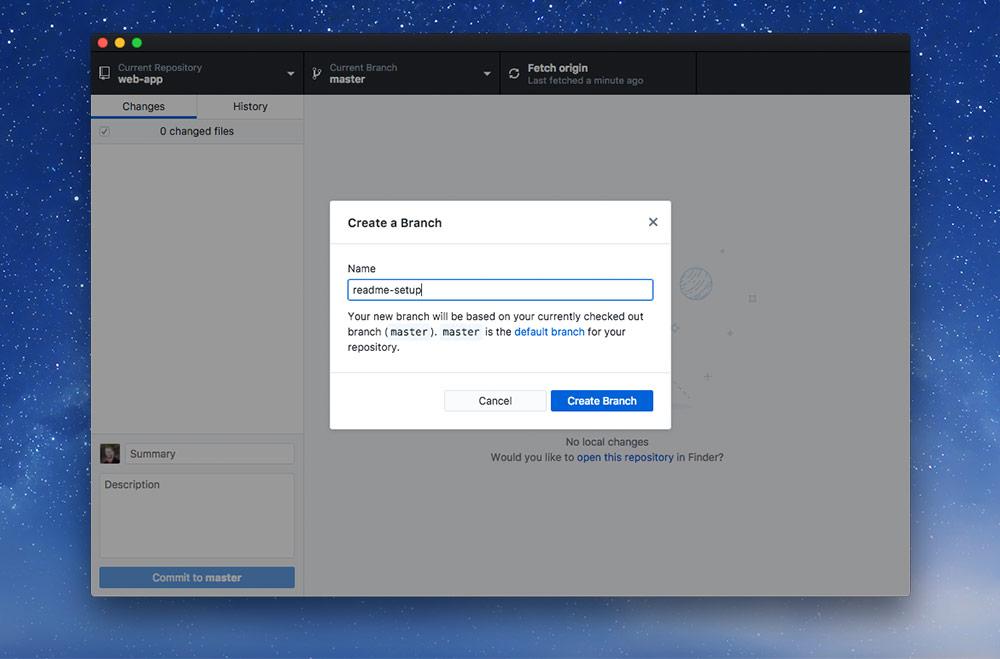
Name the new branch something like setup-readme then press “Create branch”. This is the process you’ll go through every time you code a new feature—we’ll discuss this in more detail later.
Add a descriptive readme
DevOpen up the folder in your code editor and edit the README.md file, adding a few details. Something like this will work:
# Web app prototype

This repository is a prototype for a web app created in Graphic Design’s Web Dev 6 course.

## Team members

- Thomas J Bradley <https://github.com/thomasjbradley>
- Dino Demos <https://github.com/dinodemos>
Save and commit that. Make sure you’re not committing to the master branch.
-
Commit conventions
Don’t forget to follow the Git commit best practices.
Add a GitIgnore file
DevCreate a new file in the repository named .gitignore and add this information to it. Copying is enabled for efficiency.
# Jekyll
_site
.jekyll-metadata
.jekyll-cache

# Adobe files
*.pdf
*.ai
*.psd
*.indd
*.indb

# Compressed files
*.zip
*.gz
*.tar
*.7z

# Type faces
*.otf
*.ttf
*.woff
*.eot
*.ttc

# Video & audio
*.mov
*.mp4
*.m4v
*.f4v
*.f4p
*.ogv
*.webm
*.flv
*.mp3
*.m4a
*.f4a
*.f4b
*.oga
*.ogg
*.opus

# Folder view configuration files
.DS_Store
Desktop.ini

# Thumbnail cache files
._*
Thumbs.db

# Files that might appear on external disks
.Spotlight-V100
.Trashes
Save and commit that.
Add an EditorConfig file
DevCreate a new file named .editorconfig in the folder and add this information to it. Copying is enabled for efficiency.
; editorconfig.org
root = true

[*]
charset = utf-8

indent_style = space
indent_size = 2

trim_trailing_whitespace = true
end_of_line = lf
insert_final_newline = true
Save and commit that.
Add a GitAttributes file
DevYou only need perform this step if one or more of your team members use a Windows computer—but it’s good practice to do it anyways.
Create another new file named .gitattributes and add this information to it. Copying is enabled for efficiency.
# Force Unix LF to make code consistent across platforms
# Helps Markbot cheat detection to work properly

*.html text eol=lf
*.css text eol=lf
*.js text eol=lf
*.md text eol=lf
*.yml text eol=lf
*.txt text eol=lf
*.svg text eol=lf
*.lock text eol=lf

.editorconfig text eol=lf
Save and commit that.
Create a pull request
DevOur next goal is to get this code into the master branch so it’s available on everybody’s computer. Step one is to publish our new branch to GitHub.
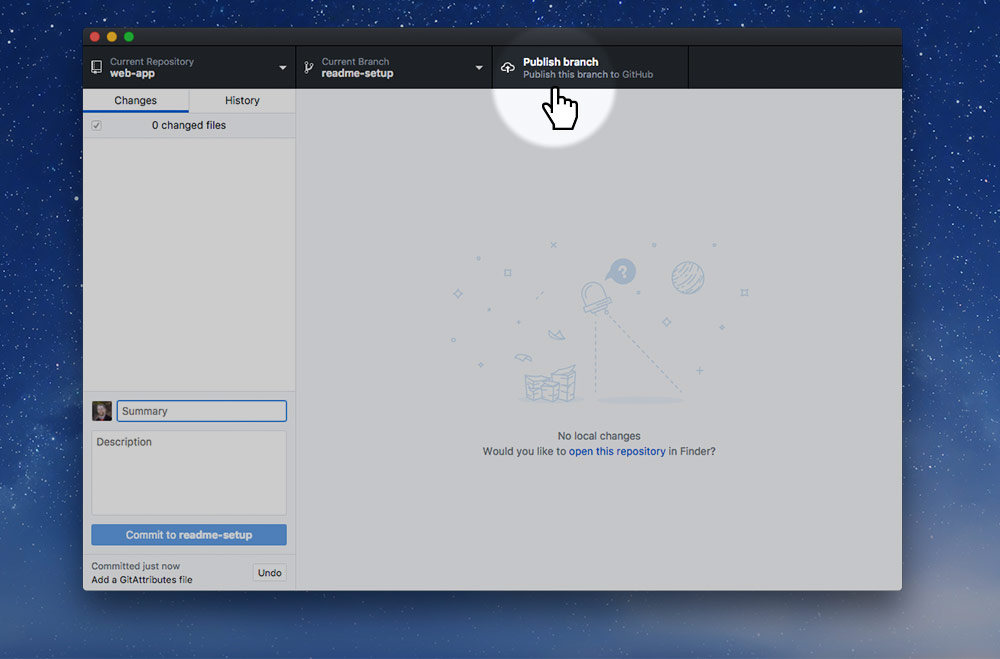
Press the “Publish branch” button which will send your setup-readme branch to GitHub.
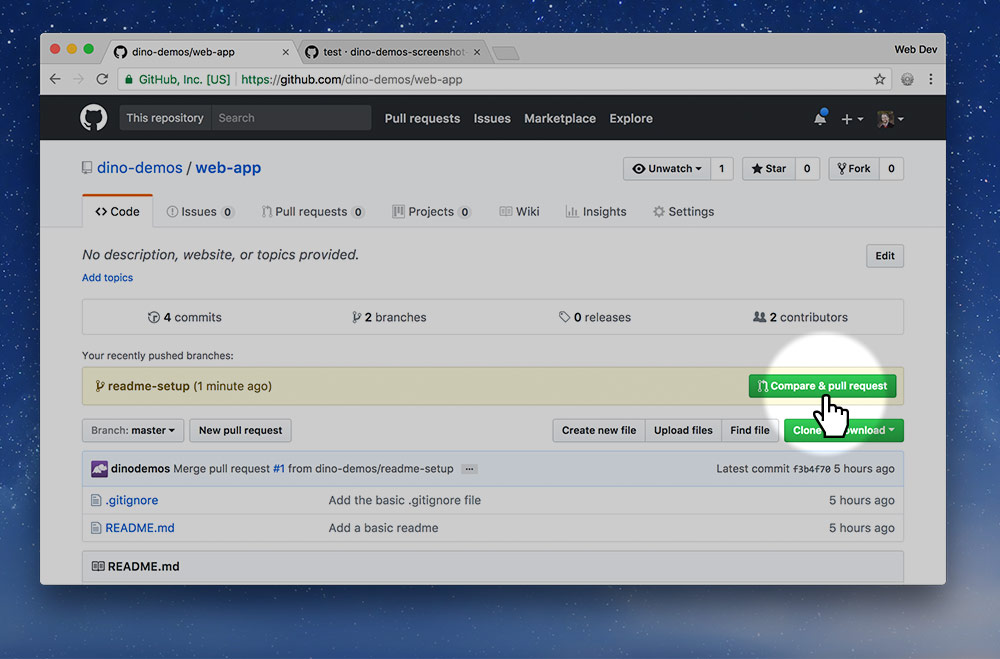
If you go to the repo’s page you’ll see the yellow new branch alert. Press the “Compare & pull request” button.
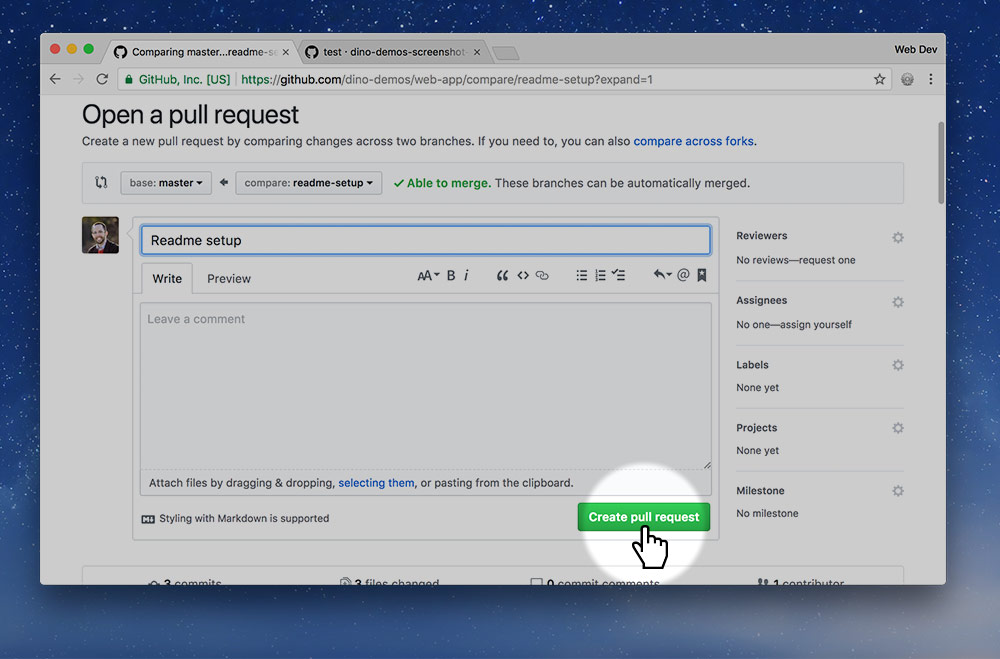
Describe what changes you made in the branch you just published and press the “Create pull request” button.
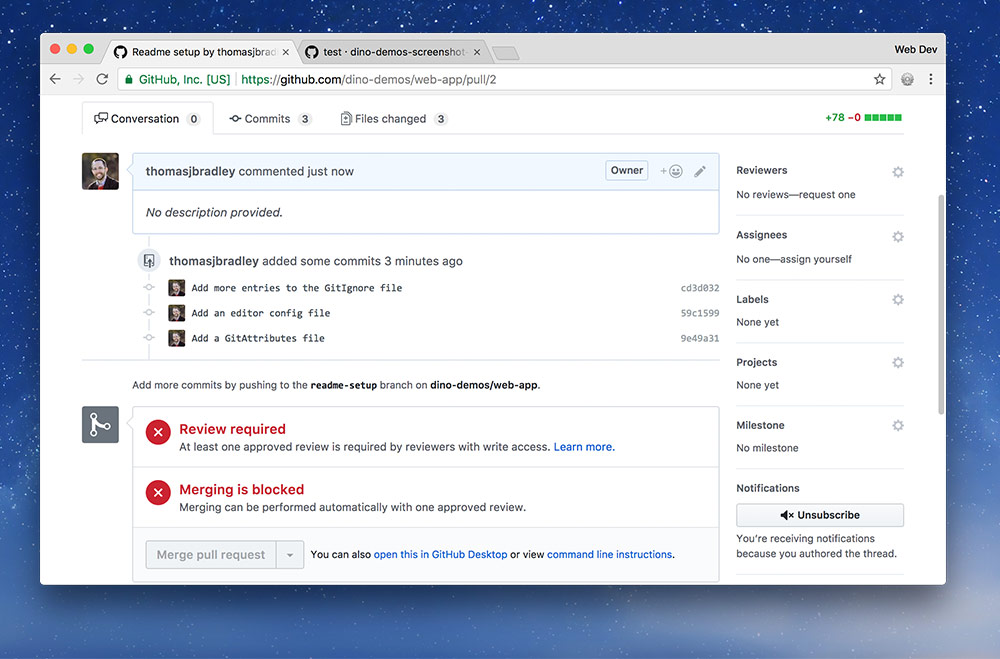
You’ll notice that next screen says a code review is required. So, now we hand the process off to another teammate, the UX lead.
Approve & merge the request
UXThis task is for the UX lead. Go to the GitHub repo page and press the “Pull requests” tab.
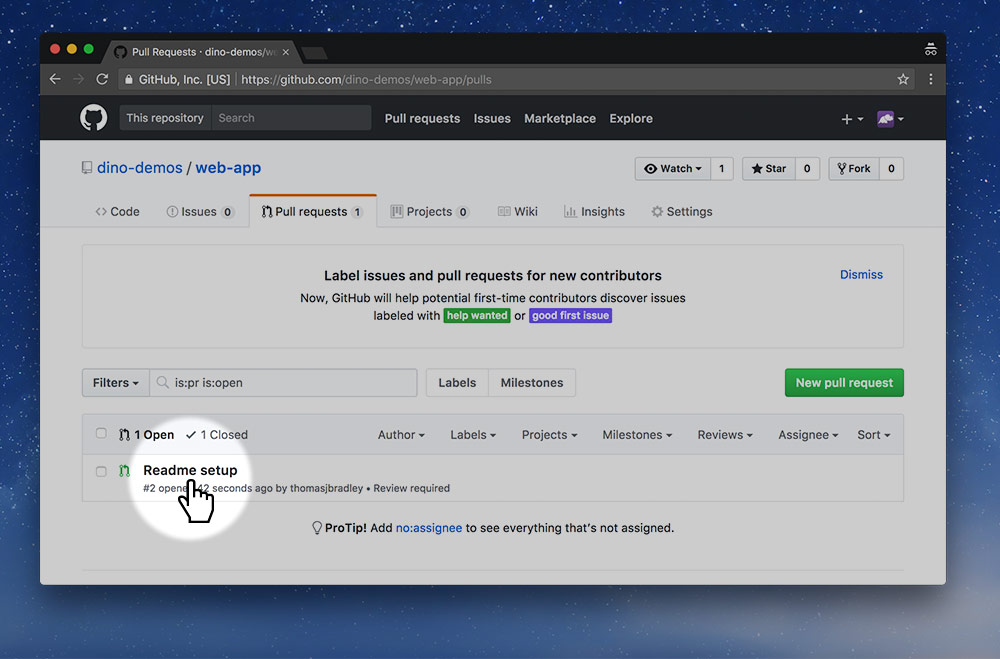
On the “Pull requests” page you should see the new pull request, click into it.
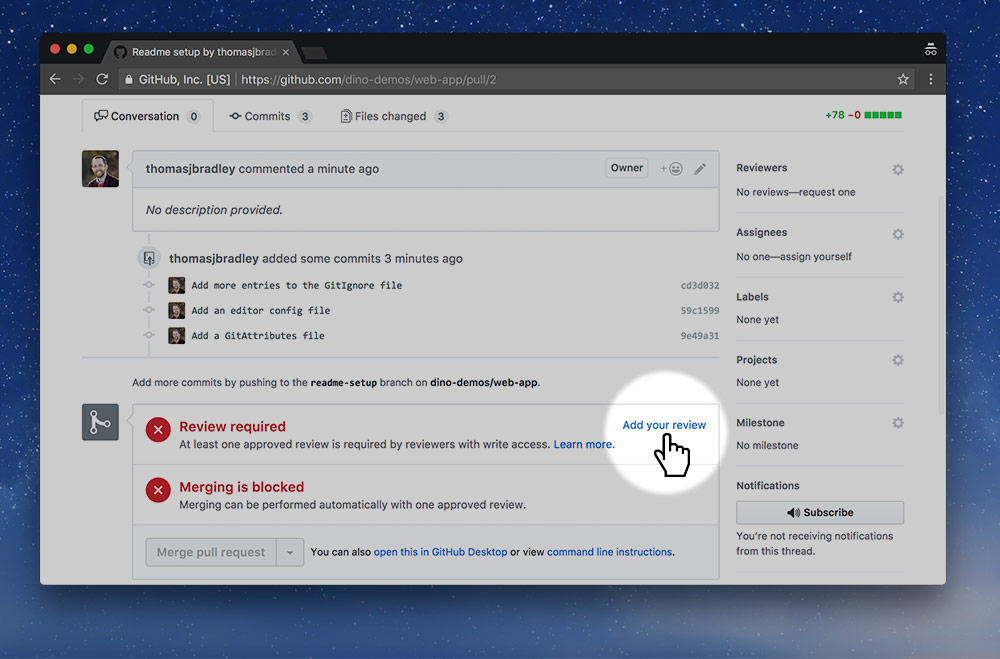
You’ll notice that the PR requires a code review to move forward. It’s up to do you do that review. Press the “Add your review” link.
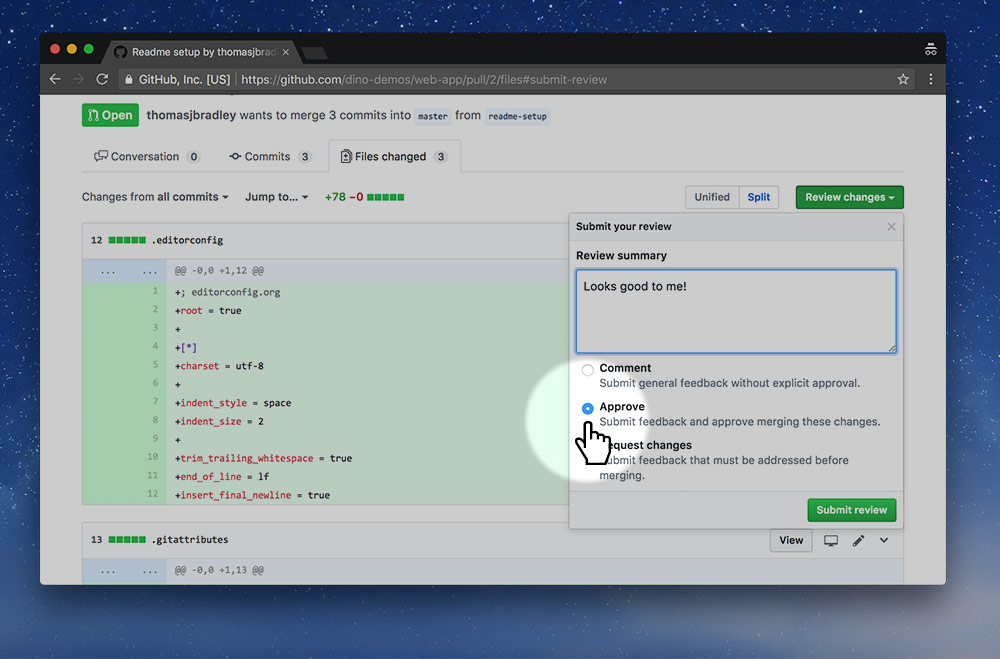
On the next screen you’ll see all the code contributions that were made. Double-check there’s no spelling mistakes or problems.
Only if everything is okay, write a small comment, select “Approve”, and press the “Submit review” button.
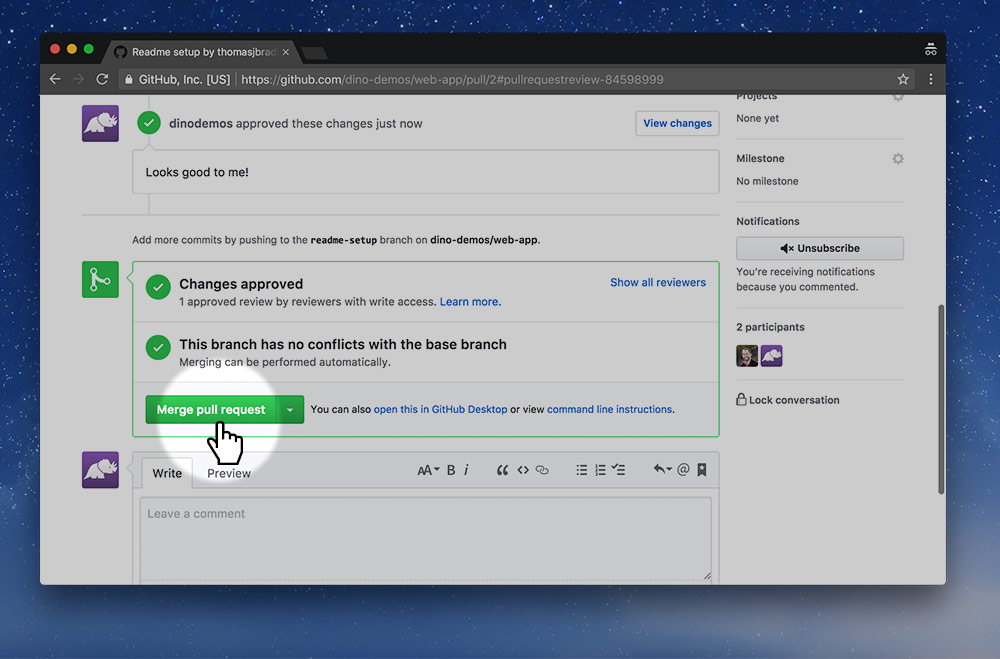
Since the code has been approved, we’re now ready to merge those changes into the master branch. Press the “Merge pull request” button.

Then press “Confirm merge”
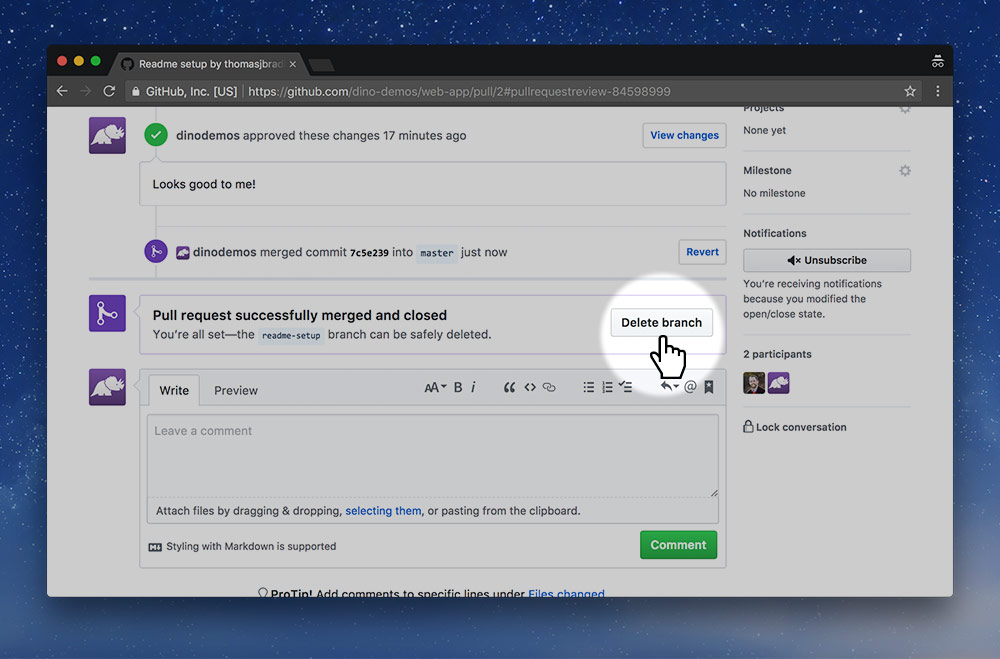
Now that the code is merged, we no longer need the branch so press the “Delete branch” button.
That only deletes it from GitHub.com, not from our local computer. We’re going to do that next.
Delete the local branch
DevBack to the dev lead. Now that the code has been merged into the master branch the local setup-readme branch is no longer necessary so we need to delete it.

Inside the GitHub Desktop app, in the menu, go to: Branch > Delete… to remove the local branch.
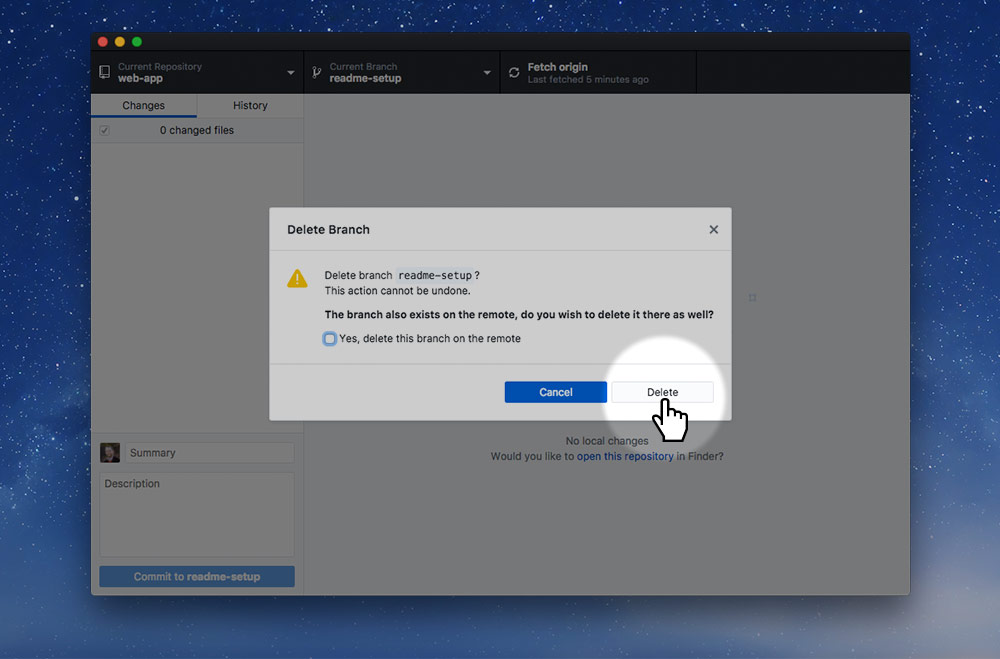
Confirm the deletion by pressing the “Delete” button.
Pull the changes from GitHub
AllFor everybody to complete. We want to make sure everybody has the most up-to-date version of the code on their computers, so they need to pull the most recent changes from GitHub’s website.
On your own computer go into the GitHub Desktop app and press the “Fetch origin” button. If it switches and says “Pull” do that too.
Double check that your local copy of the website has the correct README.md, .editorconfig, .gitignore and .gitattributes files.