Using CSS variables

Learn how to use CSS variables to make your CSS more easily understood and more maintainable.

Goal

CSS variables are a powerful solution to create reusable information in your CSS that can be changed and manipulated more easily than doing a search and replace.

Another great benefit is that we can give the variables names that make our CSS more obvious instead of having random numbers & colours scattered around.

This is what it should look like when it’s done:

  1. Type it, type it real good

    Remember the purpose of this lesson is to type the code out yourself—build up that muscle memory in your fingers!

  2. Browser support

    Probably not quite ready to be used in a live, client-facing website yet. Still waiting on Microsoft Edge for support.

Fork & clone

Start the lesson by forking and cloning the using-css-variables repository.

Fork & clone the “using-css-variables” repo.

The repository will have some starter files to get you on your way and include requirements for Markbot so you can be sure you’ve completed the lesson.

  1. Fork, clone & Markbot

    This includes some starter code that you can get by forking and cloning the repository. You’ll use Markbot to double check everything is done properly.

1 Set up project

To get started we need some HTML & CSS files and we’ll include a copy of Modulifier, Gridifier & Typografier.

  1. using-css-variables
  2. index.html
  3. css
  4. main.css
  5. modules.css
  6. grid.css
  7. type.css
  1. Make an index.html & add the boilerplate code.
  2. Make a main.css in your css folder—it can remain empty.
  3. Make a modules.css in your css folder—get a new version from Modulifier. Make sure to press “Select All”.
  4. Make a grid.css in your css folder—get a new version from Gridifier.
  5. Make a type.css in your css folder—get a new version from Typografier.
  1. Naming conventions

    Don’t forget to follow the naming conventions.

  2. HTML snippets

    Create the boilerplate with html5, viewport, css

2 Write a little HTML

Let’s write a little HTML to get started, a simple card that we can style with a few CSS variables.

<!DOCTYPE html>
<html lang="en-ca">
<head>
  <meta charset="utf-8">
  <title>Using CSS variables</title>
  <meta name="viewport" content="width=device-width,initial-scale=1">
  <link href="css/modules.css" rel="stylesheet">
  <link href="css/grid.css" rel="stylesheet">
  <link href="css/type.css" rel="stylesheet">
  <link href="css/main.css" rel="stylesheet">
</head>
<body>

  <div class="card chop">
    <img class="img-flex" src="https://placehold.it/320x240" alt="">
    <div class="island">
      <h2 class="card-title peta push-0">Giant robots</h2>
      <p>Smashing, crashing, bashing all,<br>Giant robots have real gall.</p>
      <a class="btn" href="#">Destroy!</a>
    </div>
  </div>

</body>
</html>
  1. Line R

    Using the <br> tag here is okay because the text is a poem, and in poetry the line breaks are part of the content.

3 Write a little CSS

Let’s add a little CSS to our card to get it looking kinda actually like a card.

Some of these properties are temporary and we’ll probably replace them later.

html {
  font-family: sans-serif;
}

.card {
  max-width: 24em;

  border: 3px solid red;
  border-radius: 4px;
}

With the CSS in place, we should now be seeing this in our browser:

  1. Line H

    Let’s make the border red for now, but we’ll likely change it later.

  2. Line I

    I’m not sure if I like the 4px border radius, I think I’ll change it later to have more personality.

4 Change colours & border-radii to variables

CSS variables allow us to put information in a common location. We can then use that information in multiple places in our CSS.

It works really well for things like colours and fonts. We define them once, at the top, then use them in multiple places. It’s especially helpful for colours because we don’t have to remember the hex value, just the name of the variable—which our code editor should autocomplete for us.

We can define our variables anywhere in the CSS, but it’s often best to define them at the very top, in the :root selector.

:root {
  --color-primary: red;
  --border-radius: 4px;
}

html {
  font-family: sans-serif;
}

.card {
  max-width: 24em;

  border: 3px solid var(--color-primary);
  border-radius: var(--border-radius);
}

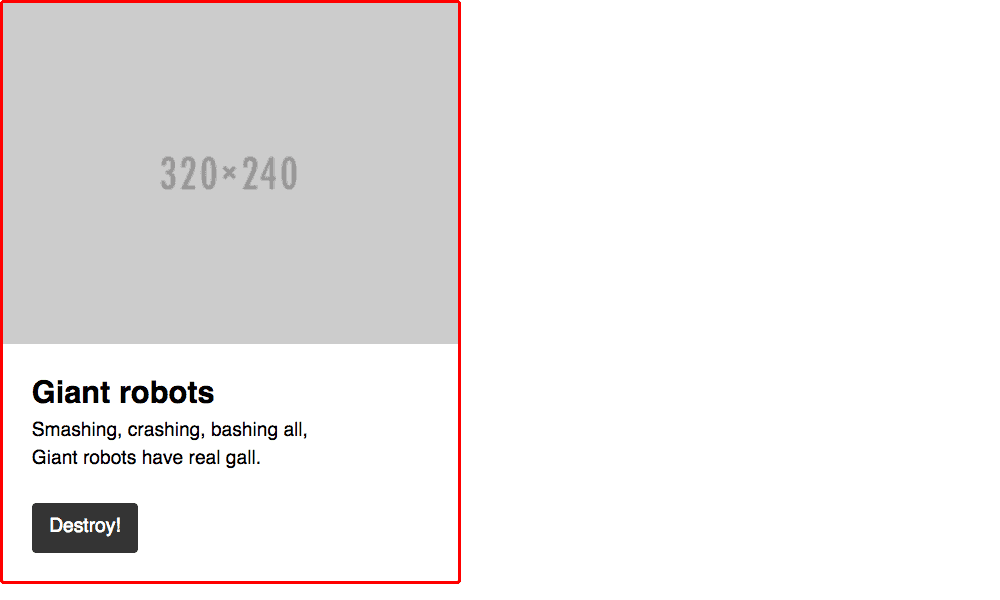
If everything was spelled properly, it should still look exactly the same in the browser:

  1. Line A

    We can create a new block in our CSS called :root—within this we can create variables that are shared on the whole website.

    The :root block should always be at the top of the CSS file.

  2. Lines B–C

    Variable names always start with two dashes (--), then you make up whatever you want afterwards.

    I always start the variable name with --color if it’s a colour or --font if it’s a font.

  3. Lines M–N

    When we want to use the variable we start with the var() function and write the name of the variable inside it.

    Whatever value is defined for the variable at the top of the page, inside :root, will be output into the location you use var()

5 Style more things with variables

Let’s now style a few more things on the page with our variables.

⋮
  border: 3px solid var(--color-primary);
  border-radius: var(--border-radius);
}

.card-title {
  color: var(--color-primary);
}

.btn {
  background-color: var(--color-primary);
  border-color: var(--color-primary);
  border-radius: var(--border-radius);
}

Our card should now have matching colours and border radii for the whole thing:

  1. Lines F–H

    If we target .card-title we can use the --color-primary variable to change its colour to match the border of our card.

  2. Lines J–N

    We can do the same on our button, using the colour and border radius variables to adjust the button to match our card a little more.

6 Variables for fonts

I’d like to make the fonts into variables. But first, let’s add another font to our website.

Go to Google Fonts and select “Roboto Slab”—make sure to choose “Normal” and “Bold”.

⋮
  <link href="css/modules.css" rel="stylesheet">
  <link href="css/type.css" rel="stylesheet">
  <link href="css/main.css" rel="stylesheet">
  <link href="https://fonts.googleapis.com/css?family=Roboto+Slab:400,700" rel="stylesheet">
</head>
<body>
⋮

In our CSS let’s add two variables:

  1. One for the primary font, sans-serif
  2. And one for the secondary font, "Roboto Slab"

Then we’ll use those fonts in a few places in our CSS.

:root {
  --color-primary: red;
  --border-radius: 4px;
  --font-primary: sans-serif;
  --font-secondary: "Roboto Slab", sans-serif;
}

html {
  font-family: var(--font-primary);
}

.card {
  max-width: 24em;

  border: 3px solid var(--color-primary);
  border-radius: var(--border-radius);
}

.card-title {
  color: var(--color-primary);
  font-family: var(--font-secondary);
}

.btn {
  background-color: var(--color-primary);
  border-color: var(--color-primary);
  border-radius: var(--border-radius);
  font-family: var(--font-secondary);
}

Now with the the font variables in place we should see this:

  1. css/main.css — Line I

    Here we’ll set the font of all the main body copy to our primary font.

  2. css/main.css — Line U

    We’ll set the font family of the main card heading to our secondary font, to make it stand out from the rest of the text.

  3. css/main.css — Line AB

    We’ll also set the button to use our secondary font.

7 Edit once, change everywhere

I’m not happy with the colours or the border radii of the design. So I want to change them all—this is where CSS variables really show their flexibility.

If I just change just the variables at the top of my file then everything that uses them will automatically change too.

:root {
  --color-primary: #f39;
  --border-radius: 14px 0 14px 0;
  --font-primary: sans-serif;
  --font-secondary: "Roboto Slab", sans-serif;
}
⋮

Check it out in your browser! You should see that all the colours are a much nicer magenta and the border radii are more unique and engaging—and we only had to change two lines of code.

Drop it into Markbot & submit

Drop the final, coded exercise into Markbot and fix all the errors until Markbot gives you all green (and maybe a little yellow).

After you’ve fixed all the problems, go ahead and submit the assignment. You’ll immediately get your grade.

  1. Submit

    Whenever you’ve passed all Markbot’s specific tests go ahead and submit this lesson for marks.