We’re going to start the pattern library that you’ll be working for the rest of the term in this lesson.
We’ll get the first bits set up and ready to use so you can move onto styling the typography.
Create the first few basic files for your ecommerce pattern library and use Patternbot to generate the component website.
We’re going to start the pattern library that you’ll be working for the rest of the term in this lesson.
We’ll get the first bits set up and ready to use so you can move onto styling the typography.
Remember the purpose of this lesson is to type the code out yourself—build up that muscle memory in your fingers!
Start the lesson by forking and cloning the ecommerce-pattern-library repository.
Fork & clone the “ecommerce-pattern-library” repo.
The repository will have some starter files to get you on your way.
This includes some starter code that you can get by forking and cloning the repository.
After we’ve forked our repository we’re going to immediately add a new file into the folder.
We’re going to set which version of the Ruby programming language we’d like to use; it’s very critical for when we start hosting our website, but not too important on our local computers.
2.6.2
You’re literally just typing those numbers into this code file—absolutely nothing else.
Because we started the filename with a . we won’t be able to see it in Finder; the starting . instructs Finder that it’s a hidden file.
Version 2.6.2 is a fairly recent version of Ruby that you can use—but you can always go to Ruby’s website to find a newer version.
Or even better, check out Netlify’s build image to see what version of Ruby is their default: Netlify’s build image
We’re almost ready to install & setup Jekyll & Patternbot—but first we need to initialize Ruby & Bundler. We need to—again—use your computer’s Terminal application. In fact we’re going to be using Terminal quite regularly now.
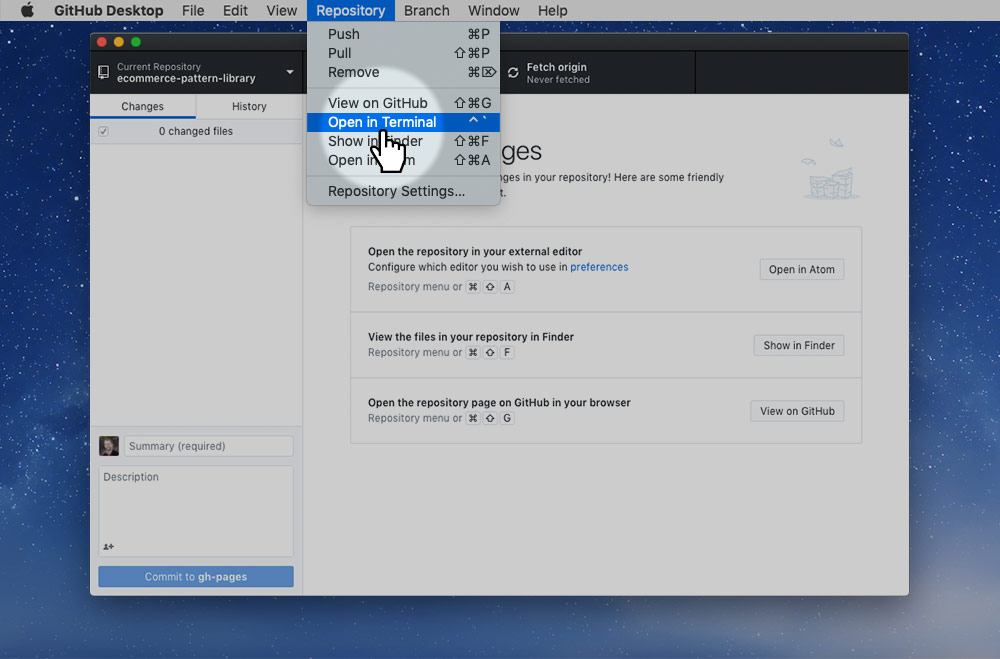
Inside GitHub Desktop, go to the Repository menu and press Open in Terminal—this will open the Terminal app and point it to the correct folder.
Once inside Terminal type exactly: bundle init—then hit Return
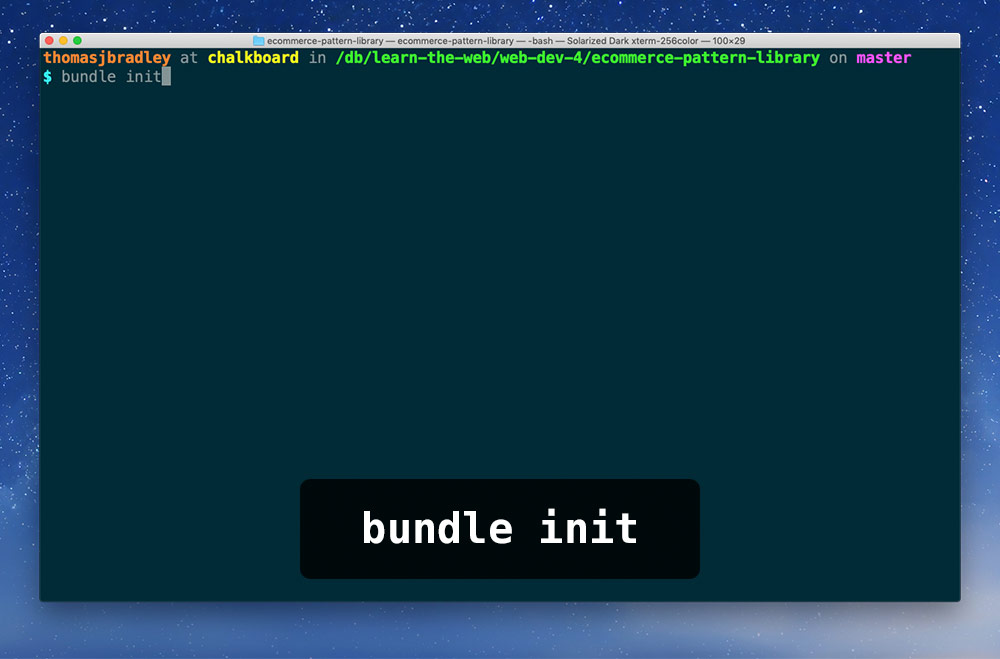
Your Terminal will look different—mine is highly customized. You won’t even be able to get down to the next line like the screenshot shows.
If you pop back to your code editor now you’ll see that Bundler has created a new file: Gemfile (Capital letters—gasp!)
Inside the Gemfile we’re going to make some adjustments to the code to install Jekyll & Patternbot.
Some of the code is already written for use—that’s why we used the bundle init command: so we don’t have to type it all ourselves.
# frozen_string_literal: true

source "https://rubygems.org"

git_source(:github) {|repo_name| "https://github.com/#{repo_name}" }

gem "jekyll"

group :jekyll_plugins do
  gem "jekyll_patternbot"
end
Save that and we’re ready to install everything!
Remove the # from the start of the line to un-comment the code. Then change it so it says jekyll instead of rails
Add these 3 new lines of code: they instruct Bundler to install the following Jekyll plugins along with Jekyll—specifically we want to install the Jekyll Patternbot plugin.
Pop back over to your Terminal and type the following command: bundle install—this will go off and download Jekyll & Jekyll Patternbot (and all their dependencies) and install them on your computer.
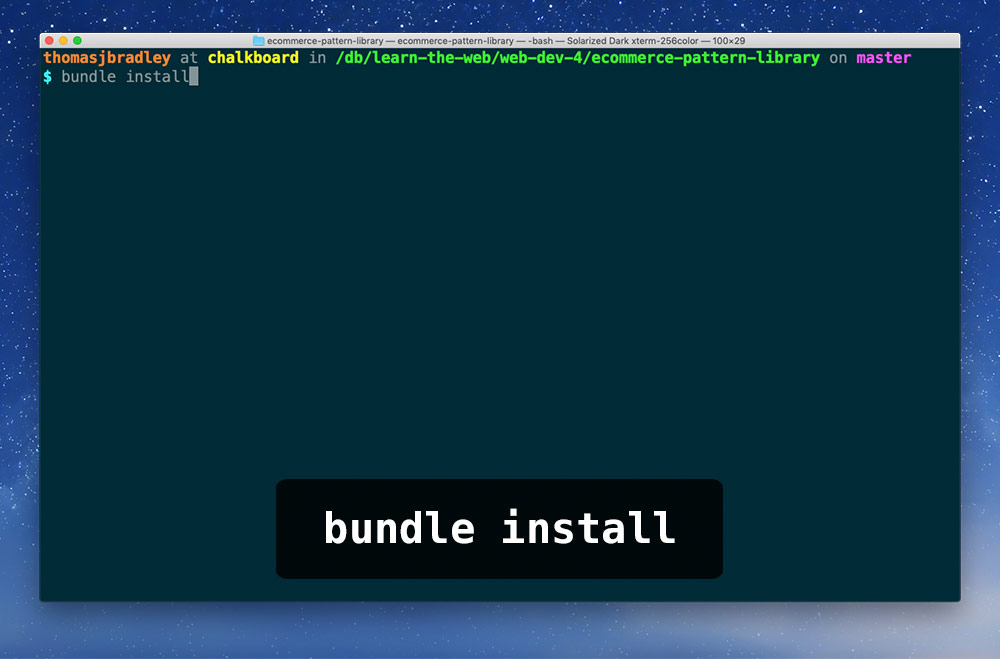
It’ll take quite a while. Wait until it’s done before moving to the next step.
The final step, before getting on to actually make our pattern library is to configure Jekyll so that it uses Patternbot. We do that by adding a _config.yml file to our folder. (Underscores—ugh!)
permalink: pretty
theme: jekyll_patternbot
Now we’re ready to go—let’s run all the things!
This tells Jekyll to strip the .html from our files when it generates our website to make the URLs nice ’n’ clean & search engine friendly.
This tells Jekyll that we’re using Patternbot in this website and that it should include all Patternbot’s includes, layouts, assets, etc. within our own site.
We’re ready! Let’s get Jekyll running in our Terminal so we can see our pattern library as we develop it.
Pop back to Terminal and type this command: bundle exec jekyll serve—then hit Return.
This is the all important command that you need to remember—though Terminal will remember it for you, next time you come into Terminal to turn your site on just press the Up Arrow and it will scroll through the command history.
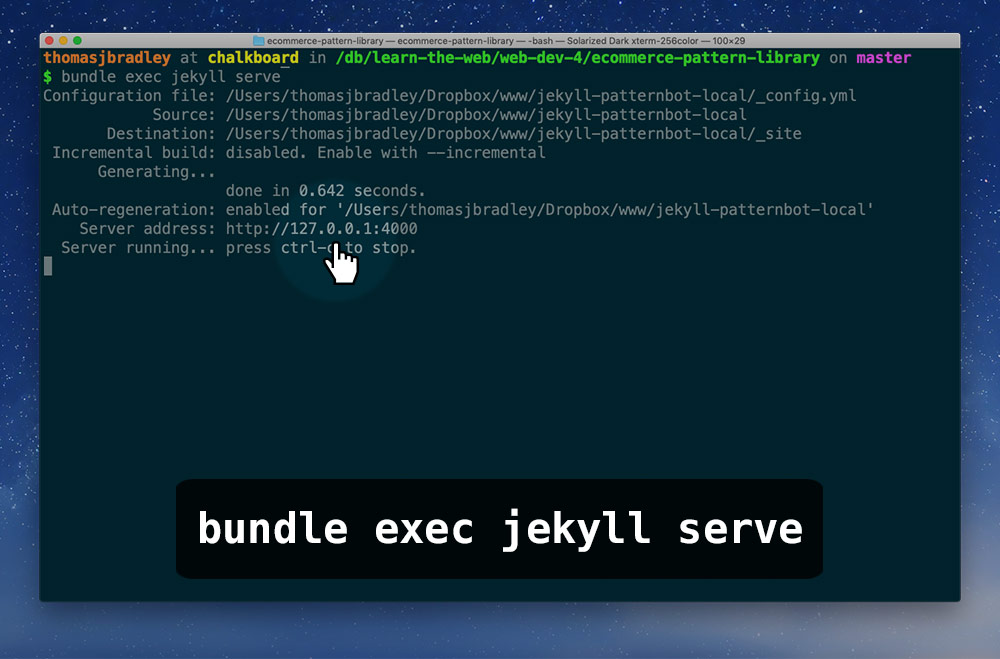
Running this command will start Jekyll. You must keep the Terminal window active for your website to function. You can minimize the window if you’d like. If you close the Terminal window Jekyll will stop running and your website will be inaccessible.
I’ve highlighted in the Terminal window an important bit: that’s the URL where you must view your website. So, let’s pop it open:
The IP address 127.0.0.1 and localhost are interchangeable—I just find localhost much easier to type.
When you pop it open in your browser you’ll see a pretty blank screen. It’s because we don’t have an index.html file.
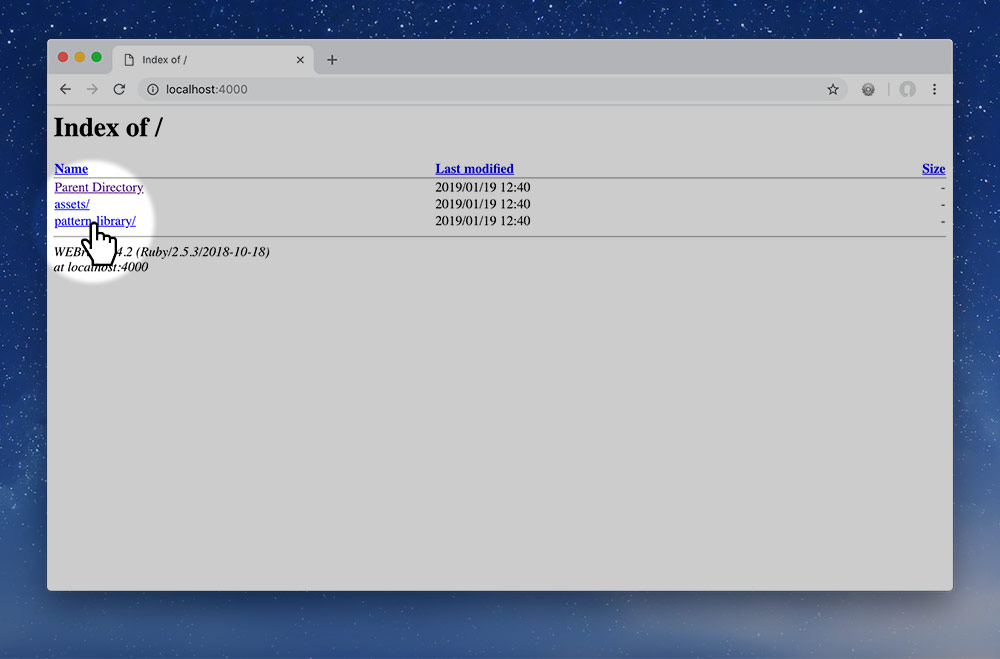
But we’re most interested in the pattern-library folder—so click that to access our pattern library.
That’s it—our pattern library! Though, it is quite empty.
The first step to actually setting up our pattern library is to get copies of all the Web Dev Tools.
modules.css in a css folder—get a new version from Modulifier.
grid.css in a css folder—get a new version from Gridifier.
type.css in a css folder—get a new version from Typografier.
Don’t forget to follow the naming conventions.
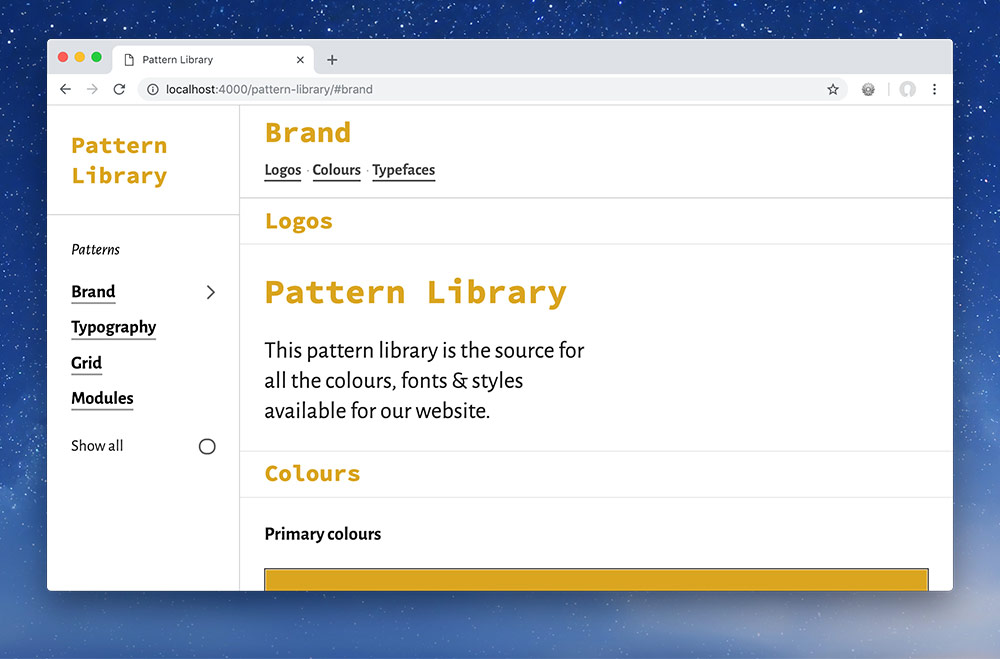
Next up we’ll create a shared CSS file, named theme.css. In here we’ll be putting a bunch of CSS variables and styling for the general typographic tags for your website.
At the top of your theme.css file, add a few variables that match the visual design of your eCommerce website.
:root {
  --color-primary: goldenrod;
  --color-primary-light: gold;
  --color-secondary: lightcoral;
  --color-accent: greenyellow;
  --color-neutral-beige: #e2e2e2;
  --color-whatever: peachpuff;

  --font-primary: "Alegreya Sans", "Trebuchet MS", Arial, sans-serif;
  --font-secondary: "Source Code Pro", Menlo, Consolas, monospace;
}

html {
  font-family: var(--font-primary);
}
All the colours & fonts above should match your visual design—don’t just copy these values, they’re wrong.
The primary font is your body copy—I consider “primary” to mean the font that’s used the most.
Check it out by refreshing in your browser!
Add a primary colour at least—Patternbot will use this in different situations.
If you have any variations of the primary colour (lighter, darker, tints, shades, etc.) name those similarly with descriptive words.
You can do the same for your secondary colour too.
If you have more colours you can name them as accent or neutral colours, or just give them any ol’ name.
Add in the different fonts you want to use. You’ll likely only need a primary & secondary font for your website. You can do accent font families too.
Go ahead and set the body copy of your website to use your primary font.
The final CSS file we’re going to create is going to mash all the other CSS files together into one large file. The technical term for this is concatenation.
CSS concatenation is great for website performance because we only download a single CSS file for the website instead of 4 or 5 different files.
Name this new CSS file main.css—which is a pretty standard name we’re used to using at this point.
Inside your main.css file we’re going to add a little bit of Jekyll code. This code instructs Jekyll to load all the other CSS files into this file—therefore combining them together into a single file.
---
---

{% include_relative modules.css %}
{% include_relative grid.css %}
{% include_relative type.css %}
{% include_relative theme.css %}
{% pattern_css %}
You won’t see any changes in the browser right now.
The two lines of 3 hyphens instruct Jekyll that this file should be parsed. If you don’t have these triple dashes in a file Jekyll will simply copy the file not compile it.
Tell Jekyll to go find these other 4 files, in this same folder and include all of their contents into this location. Essentially it copies everything from the other CSS files into main.css automatically for us.
This is a Patternbot thing, it tells Jekyll & Patternbot to find all the CSS files we’ve created for our patterns and load them into here also.
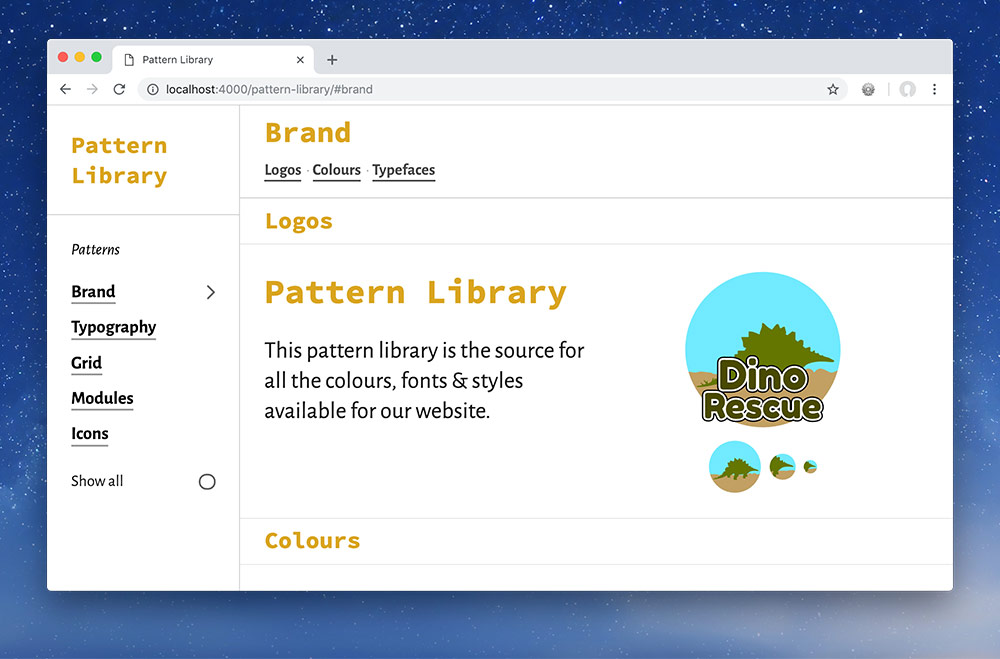
Patternbot will detect your logo images and display them on the screen, so let’s add those into your pattern library folder.
Put as many of the four sizes in as you can. Patternbot will figure out which are available and display those.
If you only made one logo and it works well at all four sizes just name it logo.svg
We’ll spend more time on this file next week when we learn about customization. But for this week we’re going to put one line of code in it, just so our typography works properly.
Now open up the config.yml and type the following code. Be sure to substitute this Google Font URL with your own. Typekit works too (ask the teacher for help).
permalink: pretty
theme: jekyll_patternbot

patternbot:
  font_url: "https://fonts.googleapis.com/css?family=Alegreya+Sans:400,400i,700|Source+Code+Pro:400,700"
YAML is very strict about indentation! If you mess up the indentation within this file, things won’t work.
This URL is the stuff inside the href="…" attribute of the <link> tag that Google/Typekit gives you.
Go refresh your browser and you should see the whole pattern library is now rendered in your font choices.
All of Patternbot’s configuration & documentation will be found under the patternbot entry.
Patternbot will use the font_url to make sure all the type in the built-in patterns is rendered in the correct font family. It will also use the weights and styles provided by the font service to display in the pattern library.