We’re going to explore how to use multiple background images as part of a design to create patterns, textures & symbols.
This is what it should look like when it’s done:
Use multiple images as background to create more complex design solutions.
We’re going to explore how to use multiple background images as part of a design to create patterns, textures & symbols.
This is what it should look like when it’s done:
Remember the purpose of this lesson is to type the code out yourself—build up that muscle memory in your fingers!
Start the lesson by forking and cloning the background-images repository.
Fork & clone the “background-images” repo.
The repository will have some starter files to get you on your way and include requirements for Markbot so you can be sure you’ve completed the lesson.
This includes some starter code that you can get by forking and cloning the repository. You’ll use Markbot to double check everything is done properly.
After forking & cloning the repository to your computer you should have the following files:
There’s also some HTML & CSS already coded so we can concentrate completely on background images.
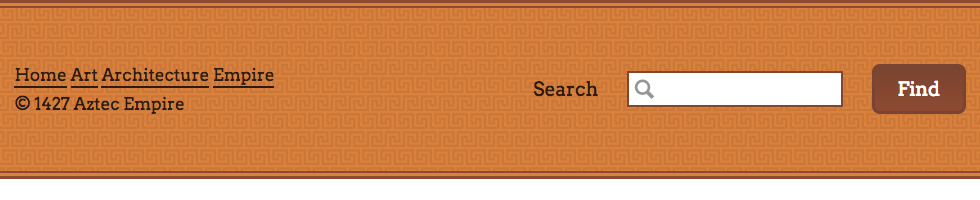
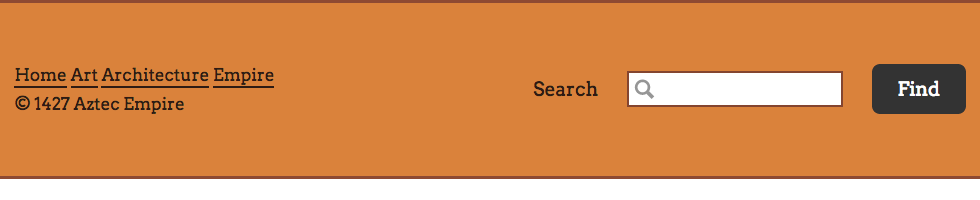
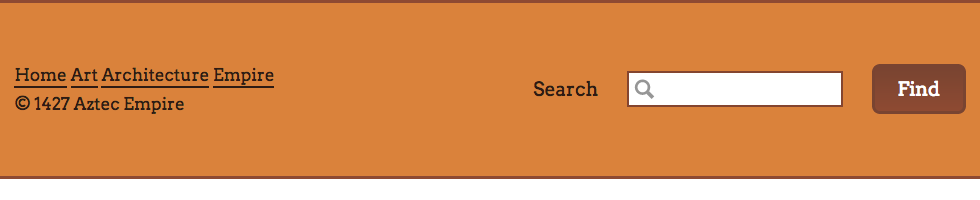
Let’s start by adding the spy glass image as an icon into the search <input> field. It’s purely decorative—not part of the content—so a background image makes sense in this situation.
⋮
.search-input {
  border-color: #84452f;
  background-image: url("../images/spy-glass.svg");
  background-repeat: no-repeat;
  background-position: .2em center;
  background-size: 1.2em auto;
  padding-left: 1.5em;
}
⋮
The padding above is important because background images don’t take up any space. So the text would end up being on top of the image, making it really difficult to read.
If you refresh your browser you should see the spy glass image inside the search field now:
The background-image property allows us to point to images and load them into the element with CSS.
There’s no alt="" attribute or any backup for background images because they’re purely decoration—if they don’t load then the design & contnet should still be perfectly functional.
The ../ part is telling the CSS to “go out of the folder we’re in” (aka the css folder) then find the images folder.
By default background images are assumed to be patterns and automatically repeat in both directions.
The background-repeat property allows us to control the repeating: to stop it or to force it in only one direction.
Setting it to no-repeat will show the image only once.
The background-position property allows us to control where inside the element the image is visible. It is always made up of a horizontal position & a vertical position.
In this piece of code the numbers mean this:
.2em from the left edge of the elementcenter is to vertically centre the elementHorizontal first, vertical second. Always.
The background-size property allows us to scale the image to dimensions we want. Width first, height second.
In this piece of code the numbers mean this:
1.2em — the widthauto — figure out the appropriate height to maintain the aspect ratioNext up we’ll add a gradient to the button. It’s a very subtle detail in the images.
⋮
.search-btn {
  background-image: linear-gradient(to bottom, #794431, #8e4a32);
  border-color: #794431;
}
⋮
This is what we should see with the refresh:
Gradients are images that the browser generates for us, they overlay onto the background-color just like all background images.
Here we’re generating a gradient that goes from the top to the bottom of the button with two colours. Gradients can get much more complex with stops and stuff.
Change the border colour of the button so it matches the new gradient better.
Next up we’ll add a patterned texture to the background of the whole footer. Since the browser assumes we want a pattern there’s very little CSS to write.
⋮
.footer {
  background-color: #da823b;
  border-bottom: 3px solid #8e4a32;
  border-top: 3px solid #8e4a32;
  background-image: url("../images/bg.svg");
  background-size: 18px auto;
}
⋮
We should now see a repeating background texture on the whole footer:

We only need to specify the url() and the size—because the browser will automatically pattern the image for us.
For the final touch, we’re going to add a double border to the bottom and the top of the <footer>. The double border is actually a few more background images that we’ll place inside the footer.
Elements can have as many background images as we want, each separated by a comma in the background-image property.
The order is important—the first image in the list is on top, the last on the bottom.
We’re adding to and replacing the CSS we write into .footer in the previous step.
⋮
.footer {
  background-color: #da823b;
  border-bottom: 3px solid #8e4a32;
  border-top: 3px solid #8e4a32;
  background-image: url("../images/border-top.svg"), url("../images/border-bottom.svg"), url("../images/bg.svg");
  background-size: 2px 5px, 2px 5px, 18px auto;
  background-repeat: repeat-x, repeat-x, repeat;
  background-position: left top, left bottom, left top;
}
⋮
Have a look in the browser and see the final version of the footer.
Multiple background images—separated by commas.
And all their associated other properties also separated by commas: background-size, background-repeat, background-position
Drop the final, coded exercise into Markbot and fix all the errors until Markbot gives you all green (and maybe a little yellow).
After you’ve fixed all the problems, go ahead and submit the assignment. You’ll immediately get your grade.