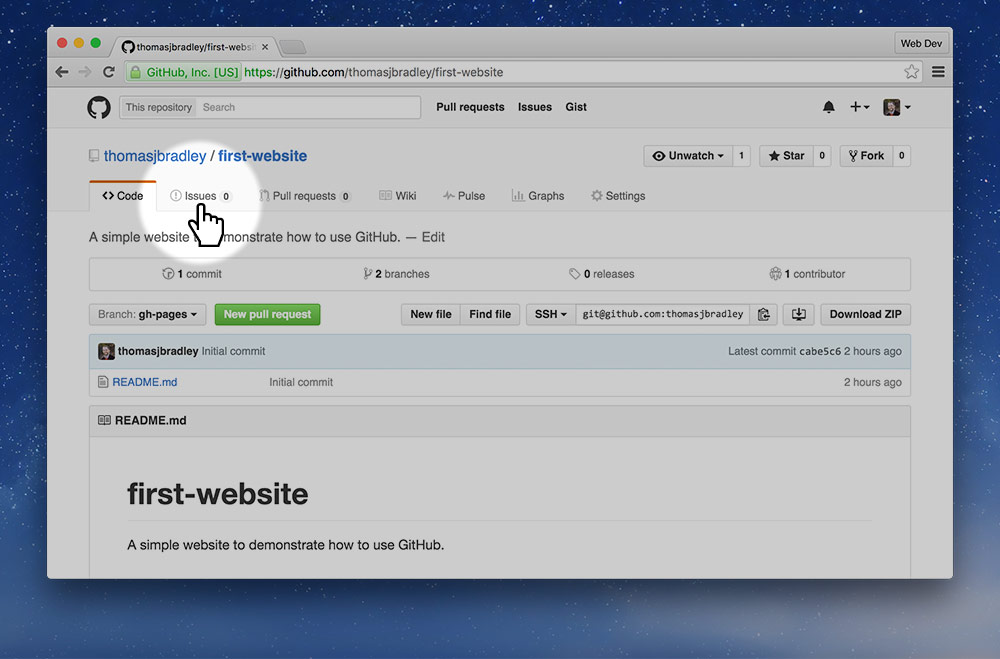
First go to the GitHub repository you are having problems with and press “Issues”.
GitHub Issues is the best way to ask for code help online. It puts the question alongside the code for easy reference.
First go to the GitHub repository you are having problems with and press “Issues”.
Sometimes the Issues tab doesn’t show when you’ve forked a repository—if that’s the case we just need to turn the Issues tab back on.
Go to the “Settings” tab, then scroll down. Under the “Features” heading there should be an “Issues” checkbox you can enable.
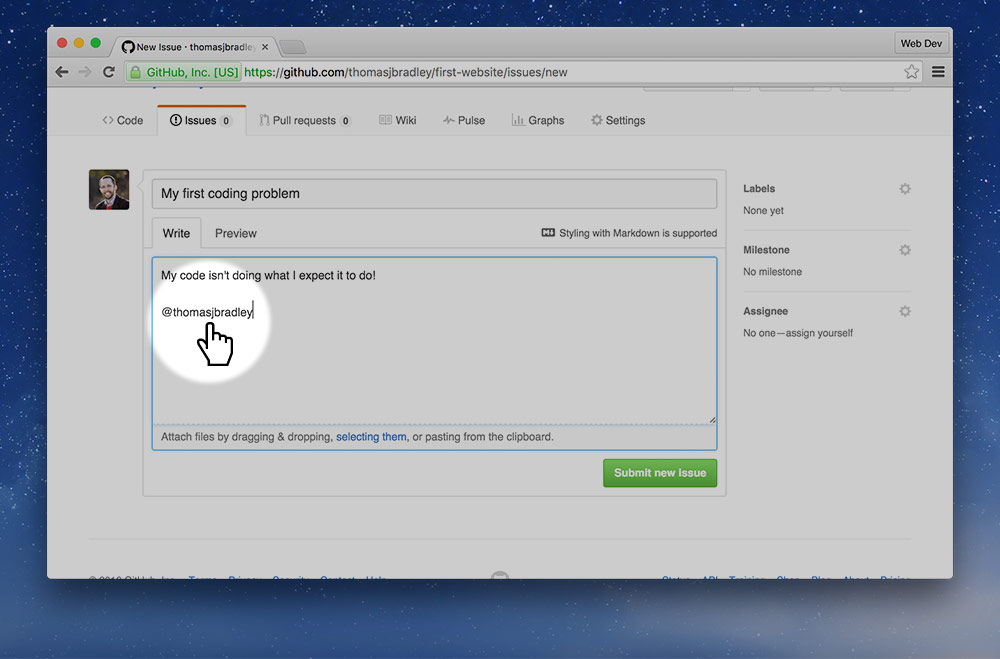
Press the “New Issue” button.

Complete the two fields in the issue describing in depth what the problem is.

Make sure to tag Thomas in your issue body with @thomasjbradley
Without the tag, Thomas won’t get notified.
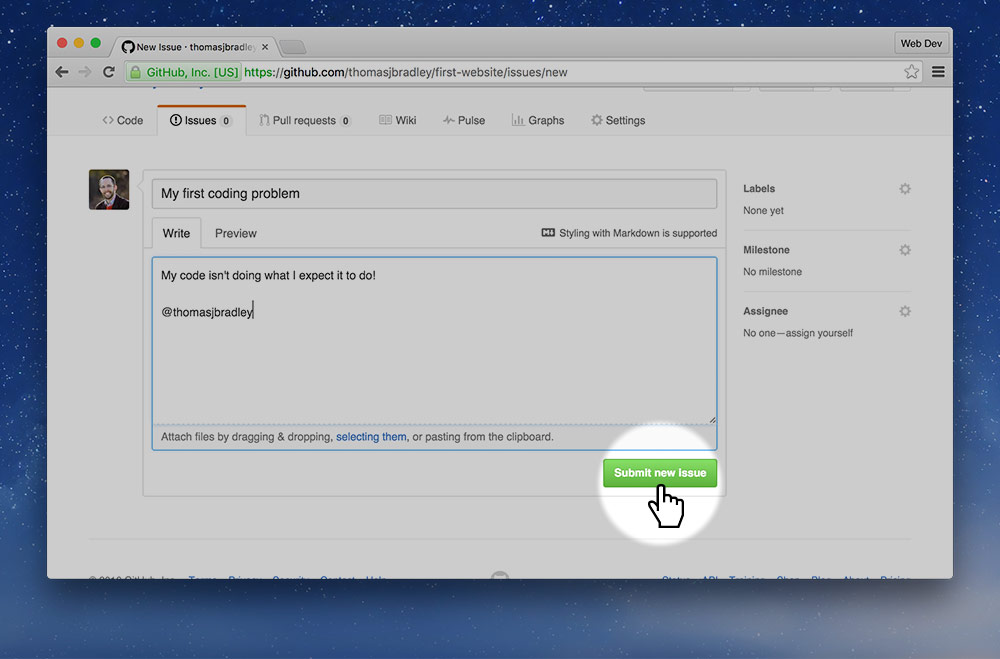
Submit the issue with the big green button.
And that’s it!
I’ll get a notification of the issue and go and respond below in the comment section.
We can have a discussion about the problem and try to figure it out.